An Android Hello World app with Kotlin
This tutorial assumes you have already download, installed, and configured Android Studio and either setup an Android Virtual Device, or have configured an Android Device for running applications
- Open Android Studio, closing any already open applications
- Choose the "New Project" option
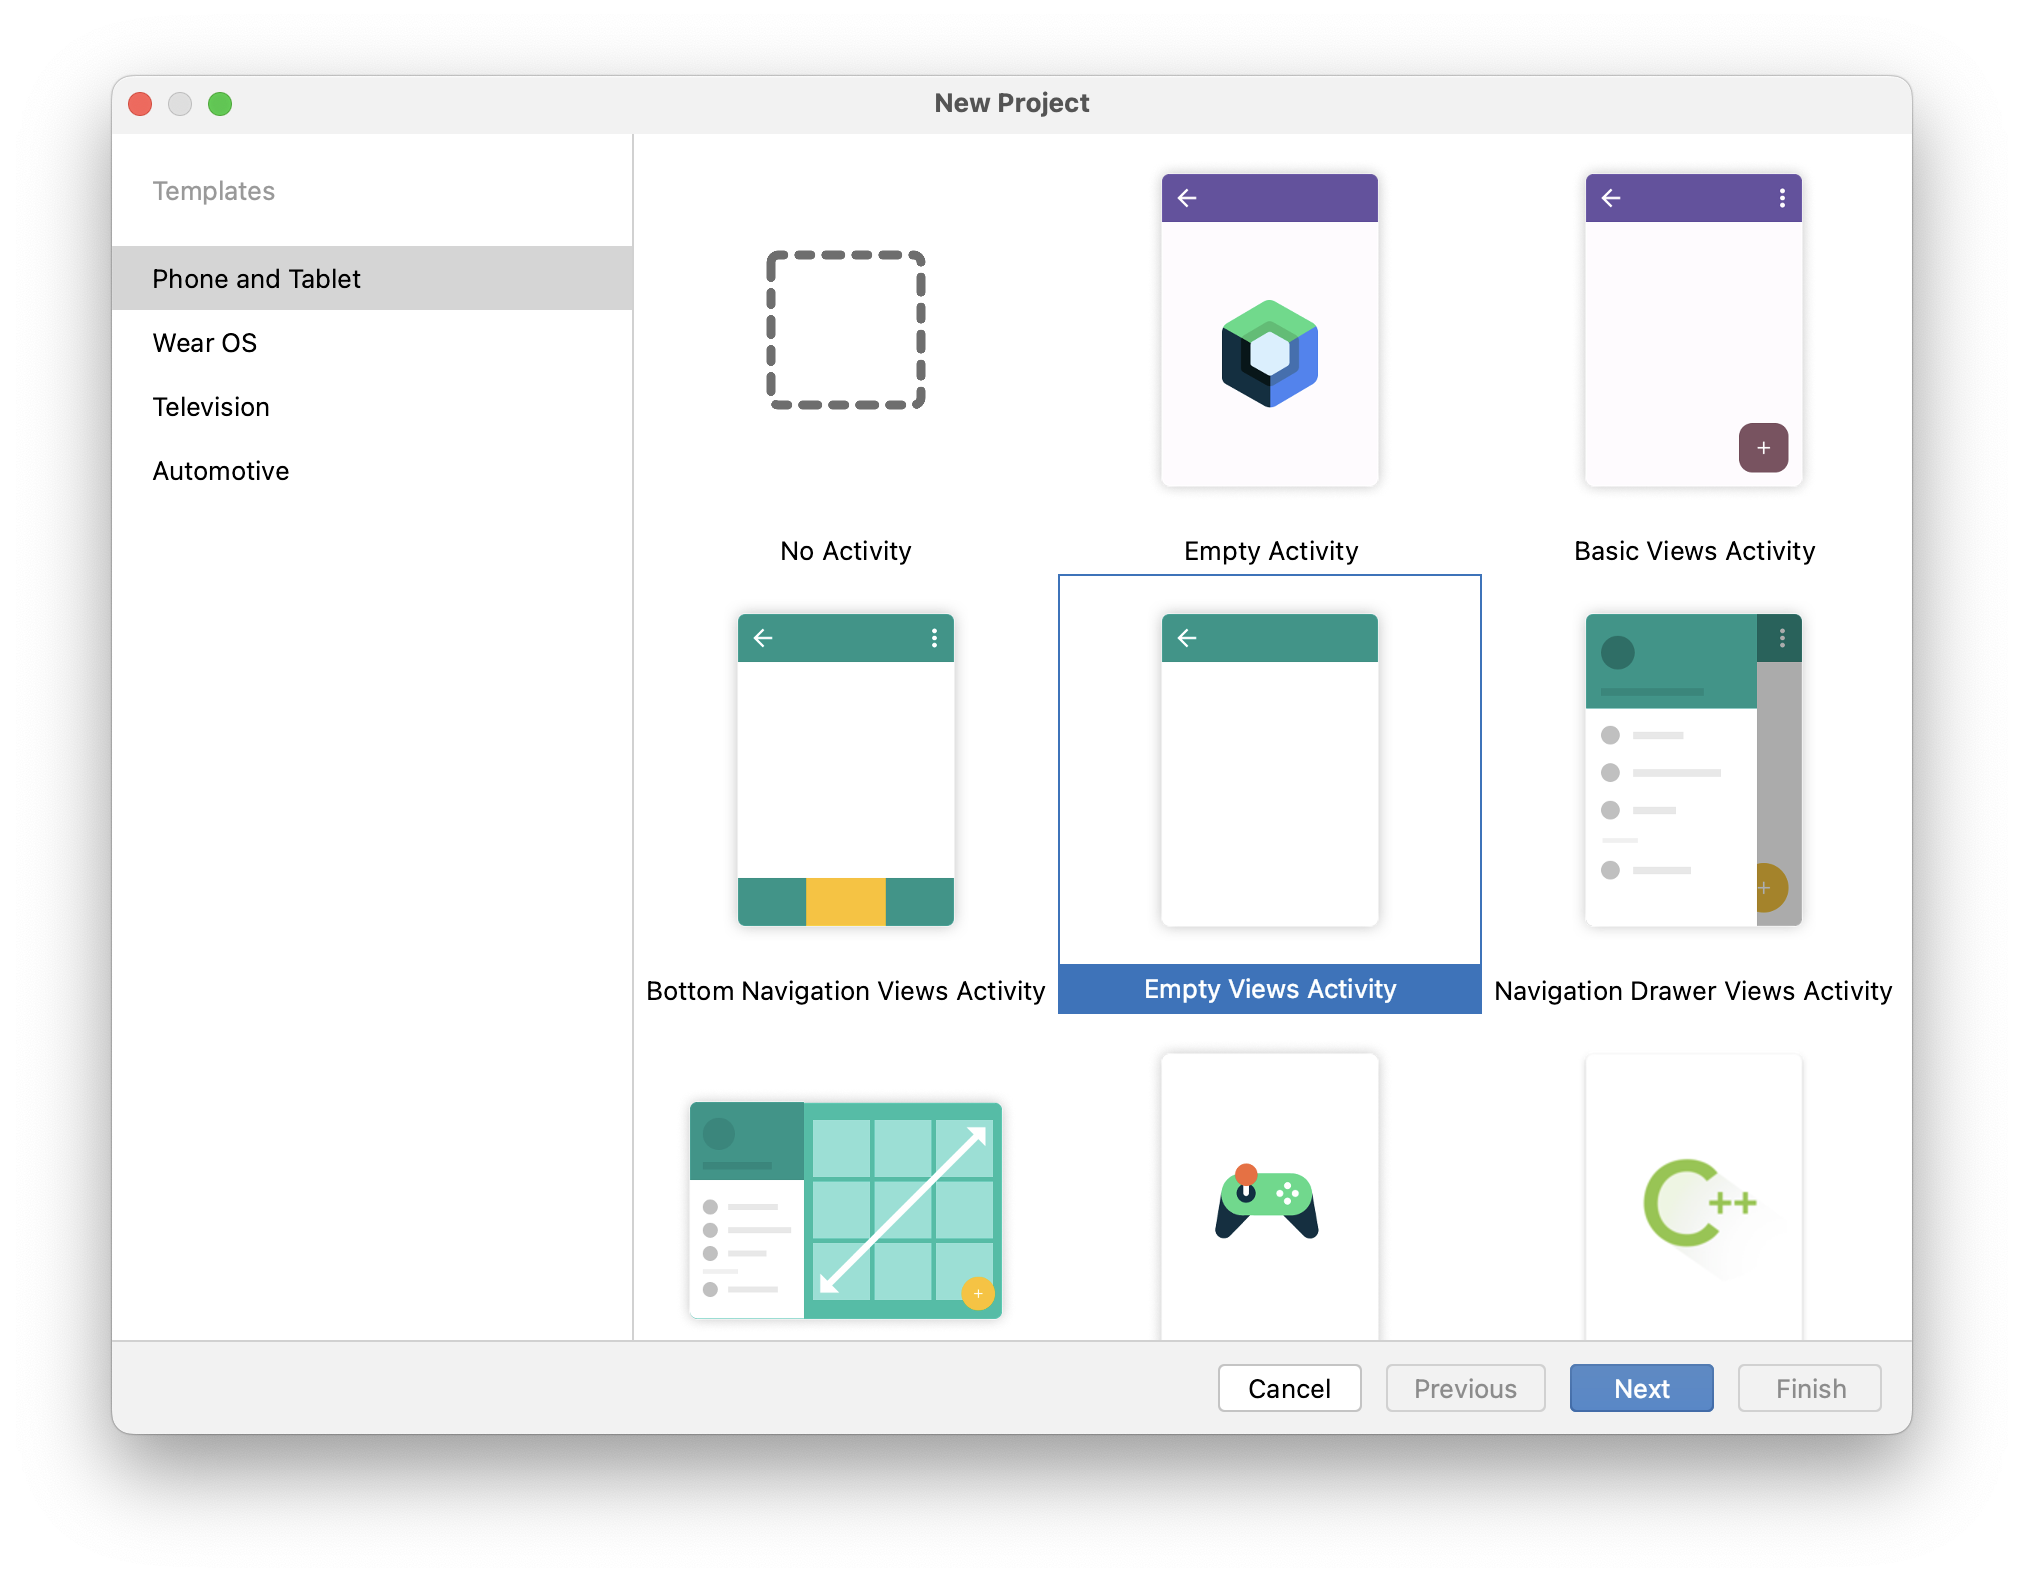
- On the first screen, choose the Empty Views Activity template option (under Phone and Tablet) and click Next
- Name the application "HelloWorld", and set the package domain as shown (you can use an alternative domain, but will need to adapt the project as appropriate at later stages). Ensure the save location is somewhere you will remember
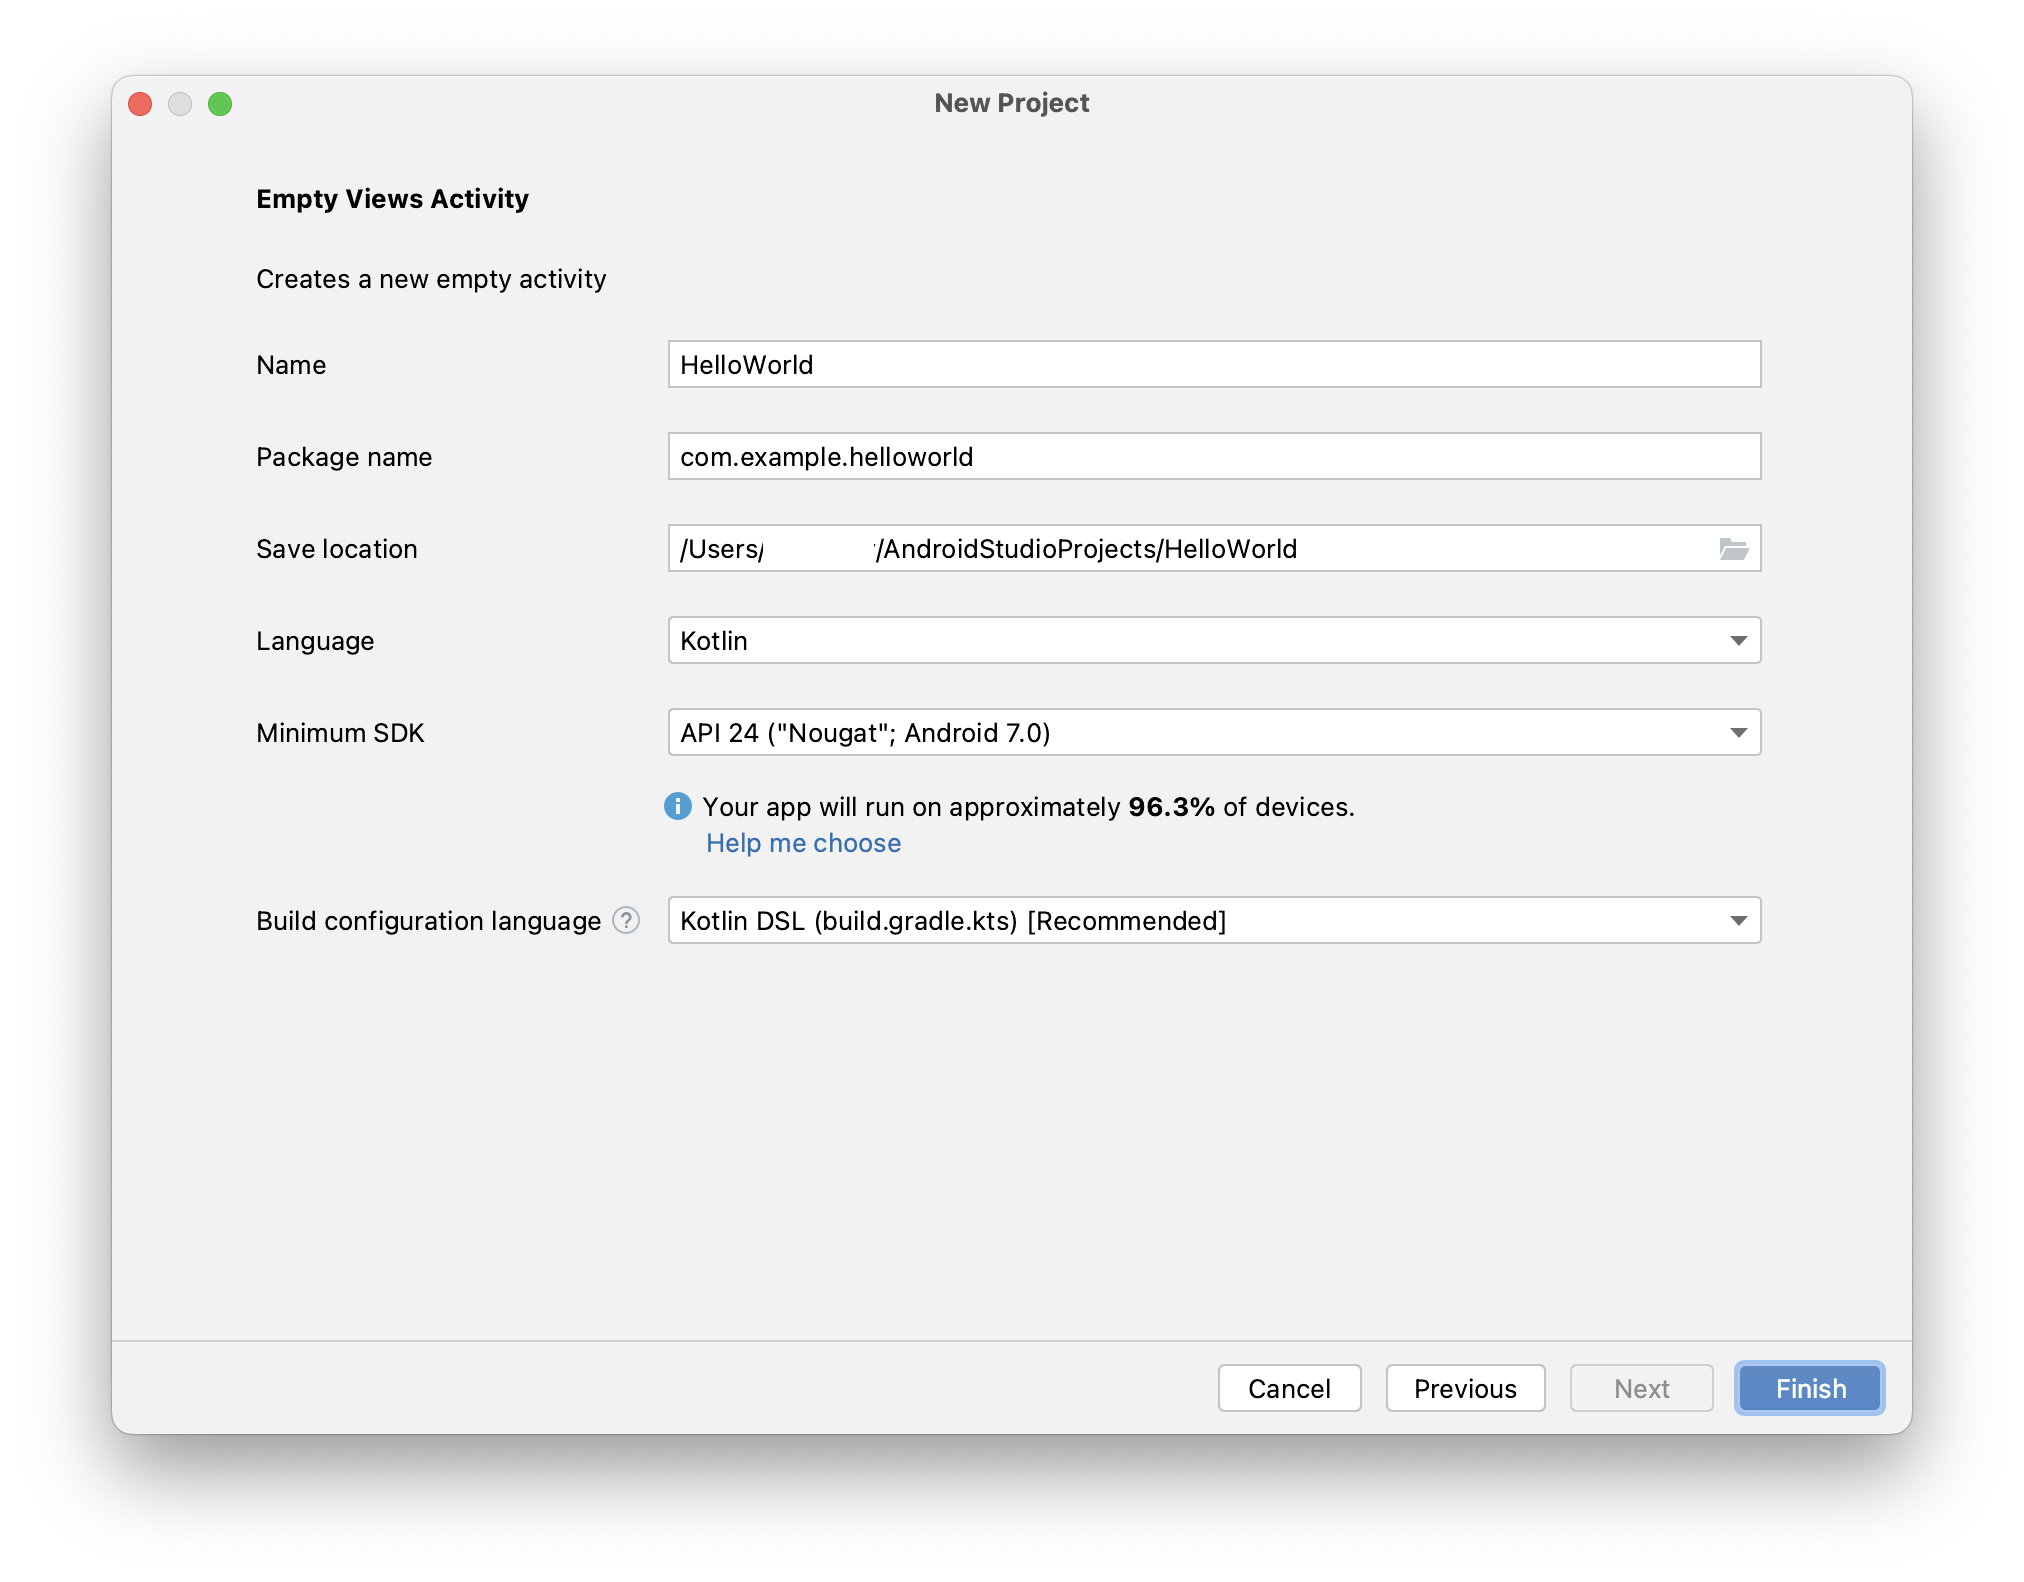
- Set the language to Kotlin
- Set the minimum API to 24: Nougat Android 7.0
- Choose Finish. The IDE will take some time to configure and build the project (depending on the speed of your computer, this could be quite a few minutes). Activitiy indicators appear at the bottom of the IDE, towards the right hand side which you can to see progress. The very first time you do this, you can expect additional files to be downloaded automcatically also, so it could take even longer if your internet connection is slow
Components of an Android Application
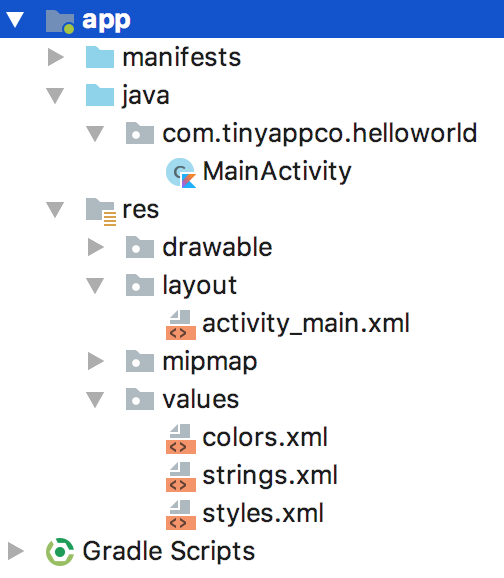 .An Android application is composed of various parts, these can be seen by expanding the folders in the project navigator. Key components include:
- Layouts: These are the user interface components, represented in XML that the user interacts with. Entire screens of UI are represented by Activities
- Programming code: Although we will be working in the Kotlin language, the code sits in a 'java' folder. Each Activity has a corresponding Kotlin file (ending in .kt) where its logic resides
- Strings: Android applications should be designed in such a way that it would be easy to create a version in a different language, known as implementing internationalisation (I18N for short). As such, Strings, such as those you might find in the user interface are represented by resources
Creating the UI
- Open the activity_main.xml file. Depending on your IDEs settings, this will appear as either XML or a UI preview. If you see the preview, click the 'Text' tab, to the bottom left of the code area
- The Empty Activity which we created, is not actually completely empty, rather it contains a TextView with the text 'Hello World!'. In the XML this is visible as an element with a a number of properties. Identify the start and end of the tag in the XML
- Using the tab, switch to the Design view, select the textview, which will be in the middle of the UI, and delete it (use the delete key or the right click context menu)
- Switch back to the Text view, and observe that the element has been removed
-
Return to the design view and ensure that AutoConnect is enabled - the icon should appear as shown here, and not with a line through it:

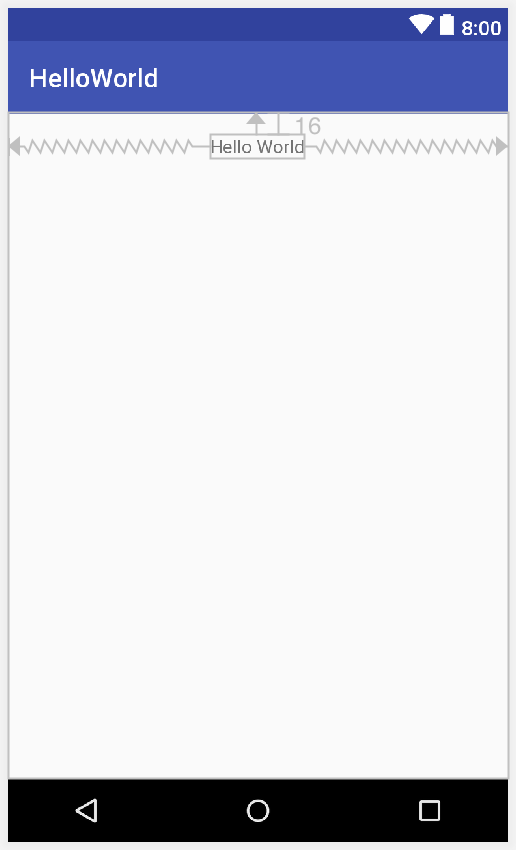
- Drag a new TextView from the Palette onto the view near the centre. Then reposition it so it is just below the blue bar at the top of the preview. It should appear to 'snap' into place and an arrow should appear between the TextView and the blue menu bar
-
Click the infer constraints button, so that the layout is inferred for all device sizes based on how you have positioned the TextView

- With the TextView selected, in the Attributes pane to the right hand side of the IDE, change the ID to tvGreeting
- Next modify its text property in the attributes pane to say "Hello World". At this point we are hard-coding a string into our UI and the IDE will show a warning triangle at the top right of the UI preview pane.
- Click the warning and a message pane should appear below the design pane, as shown here:
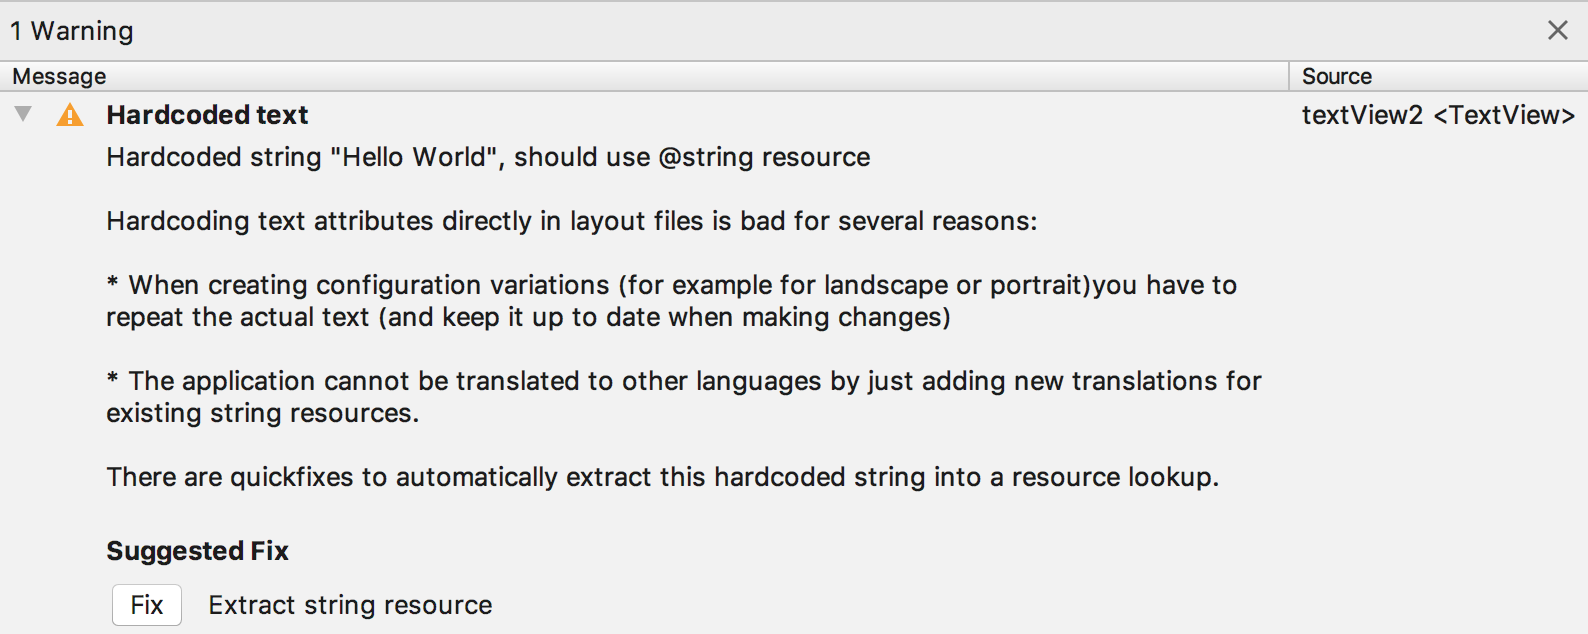
- Expand the message and you should see the full details, including a rationale for using a String resource. Click the 'Fix' button and click OK
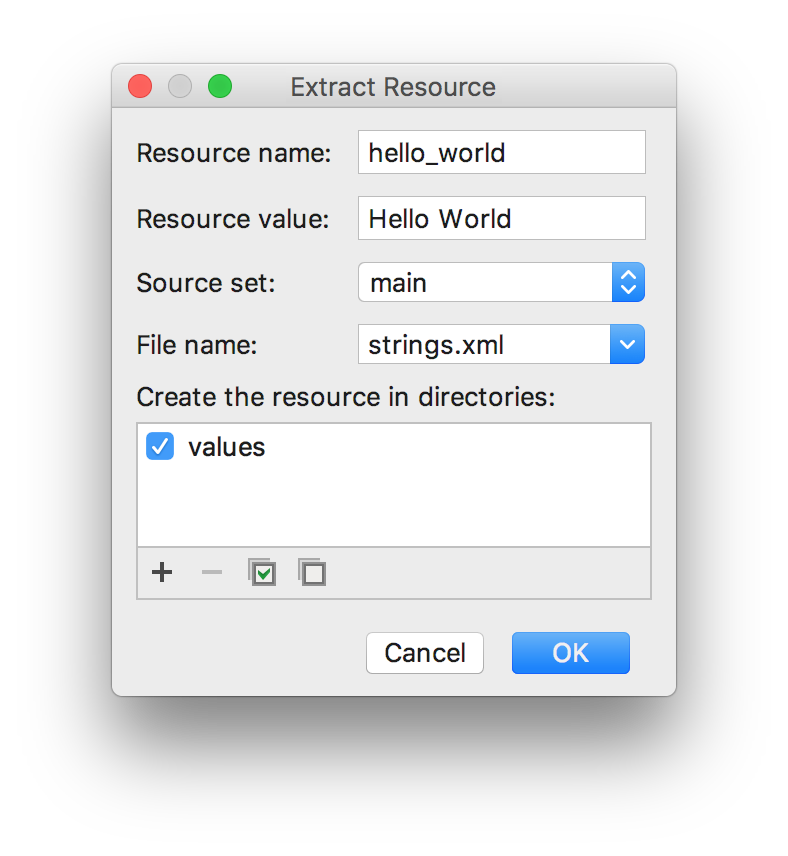 .
. - Verify that the 'text' field in the Attributes pane has the value @string/hello_world
- Run the application and verify that it opens and shows the TextView with the phrase Hello World
Enabling View Binding
In order for the MainActivity class to be able to modify components in it's associated XML, there needs to be a way to access it. Historically, this was done using a method called findViewById<>(). As an example, if we wanted to set the text of the TextView named 'textView', we would write the following code to find, and then configure it:
val textView = findViewById<TextView>(R.id.btnGreet)
textView.text = "Hello world"
As you might imagine, this becomes tedious and error prone - for example, you could find something in the wrong Activity, or use the wrong type
To mitigate this, recent versions of the Android SDK have introduced something called View Binding. This enables us to create an object that represents the view and the items inside it. To enable ViewBinding, complete the following steps:
- Open the module level build.gradle file
- Add the following code within the 'android' element:
buildFeatures { viewBinding = true } - A yellow bar should appear at the top of the window indicating that gradle files have changed - click the 'sync now' text to sync the project
- Open the MainActivity class and add the following variable inside the class:
lateinit var binding: ActivityMainBinding - Next replace the code in the onCreate method which calls
setContentViewwith the following:binding = ActivityMainBinding.inflate(layoutInflater) val view = binding.root setContentView(view)
binding.textView.text = "Hello world"findViewById<>()
Adding a button
- Add a button under the TextView and set its ID to btnGreet
- Ensure that the there is an arrow between the button and the greeting label. This arrow represents a 'constraint' and specified that it must be a certain distance below the label. Click the infer constraints button if needed.
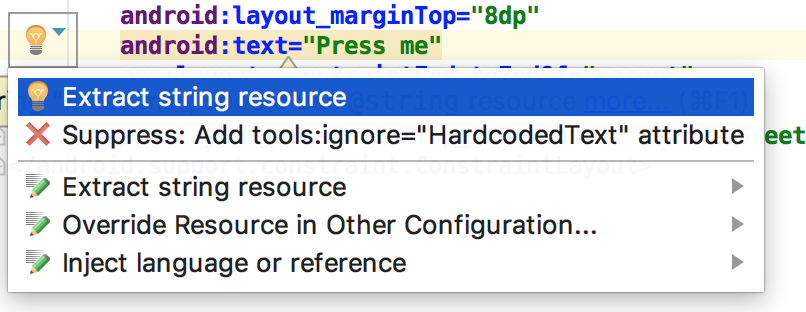
- Set the text attribute to "Press me" then switch to the text view
- The newly added button should have an attribute highlighted in yellow in the XML, as we haven't defined a String resource for it. Select this line of code and a lightbulb should appear to the left hand side. Using the dropdown menu select the 'Extract string resource' option and choose OK on the dialogue box that appears.
Making the button do something
- Open MainActivity.kt
- Modify the MainActivity class declaration so that it adopts the
View.OnClickListenerinterface as followsclass MainActivity : AppCompatActivity(), View.OnClickListener { //etc... } - A warning line will be displayed under the class name, indicating that we've not implemented the methods required by the View.OnClickListener interface
- Add the following method to implement the method, initially with no implementation:
override fun onClick(v: View?) { //handle button press } - Next add the following line to the bottom of the
onCreatemethod:binding.btnGreet.setOnClickListener(this) - Add this code to the
onClickmethod to change the text of the textview on press of the button:binding.tvGreeting.text = "Hello Android" - Run the application to make sure that it functions as expected (the text should change to "Hello Android" when the button is tapped)
- The last line of code we added will have a warning, as we've added yet another hard-coded string to our application. Using the warning's corresponding 'lightbulb' indicator, select 'extract string resource' from the menu.
- Name the resource "hello_android", and save it
- Observe that the line of code now reads as follows:
This method can be used to obtain strings declared in resources programmatically.binding.tvGreeting.text = getString(R.string.hello_android)
Tidying up
Handling the correct button press
There are a couple of improvements that can be made. Firstly, you might be wondering how we would handle multiple buttons, as there is only one onClick method. As the view that is clicked is passed as a parameter into this method, we can check which one it is. The code for this would appear as follows:
if (v?.equals(binding.btnGreet) == true) {
    binding.tvGreeting.text = getString(R.string.hello_android)
}== true to check if a value or result of an expression is true. It's required in this case, because v represents a nullable View, and we have used a safe call (designated by ?.) to the equals method. The expression v?.equals(btnGreet) evaluates to a nullable Boolean, which will either be true, false or null. Because an if statement requires a non-nullable Boolean value (or expression), we have to check for equality with true
Simplifying the onClickListener syntax
We could leave it there, but there is a simpler way to add the on-click listener. The setOnClickListener method takes anything that implements the OnClickListener interface as it's parameter, so, rather than passing in the Activity we can declare an inline anonymous object which does the same. This results in code as follows:
binding.btnGreet.setOnClickListener(object: View.OnClickListener{
    override fun onClick(v: View?){
        binding.tvGreeting.text = getString(R.string.hello_android)
    }
})onClick method from the Activity, along with the interface adoption code should now be removed
This has already simplified our code somewhat, but we can simplify it further. Kotlin permits an optimisation whereby given a function that has an interface as it's parameter, if that interface has a single function, the function can be passed in instead, as follows:
btnGreet.setOnClickListener({
    view -> run {
    binding.tvGreeting.text = getString(R.string.hello_android)
    }
})
This can be simplified even further as we are not using the view parameter it can be removed, and it is also permissible to remove the parentheses, thus the simplified version appears as follows:
binding.btnGreet.setOnClickListener{
    binding.tvGreeting.text = getString(R.string.hello_android)
}
Excluding import statements, the code for the MainActivity class is as follows:
class MainActivity : AppCompatActivity(){

    override fun onCreate(savedInstanceState: Bundle?) {
        super.onCreate(savedInstanceState)
        setContentView(R.layout.activity_main)

        binding.btnGreet.setOnClickListener{
            binding.tvGreeting.text = getString(R.string.hello_android)
        }
    }
}
Internationalising the application
In order to truly appreciate the value of String resources, we will now internationalise our application
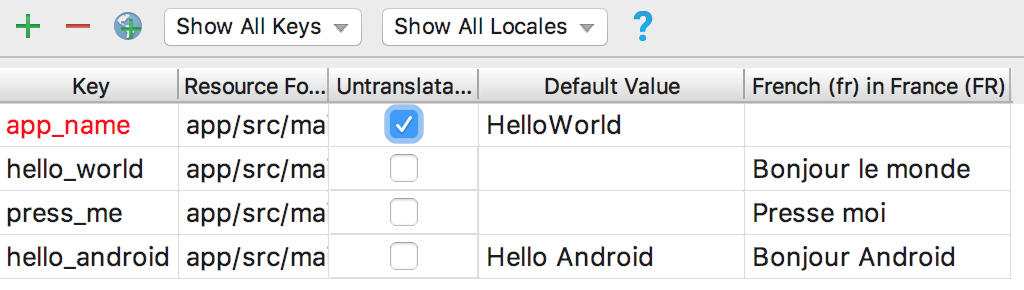
- Open the strings.xml file, which should show the Strings defined in our application. At the top right of the code pane, click the open editor link, this should show the following screen
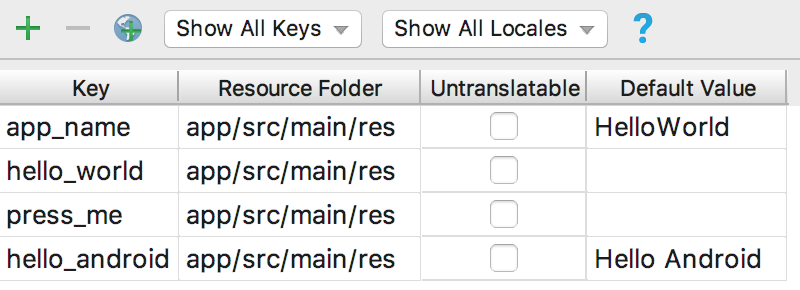 :
: - Click the world icon at the top left of the pane, and select French (fr) in France (FR) from the list. An extra column should appear.)
- Add translations as shown here:
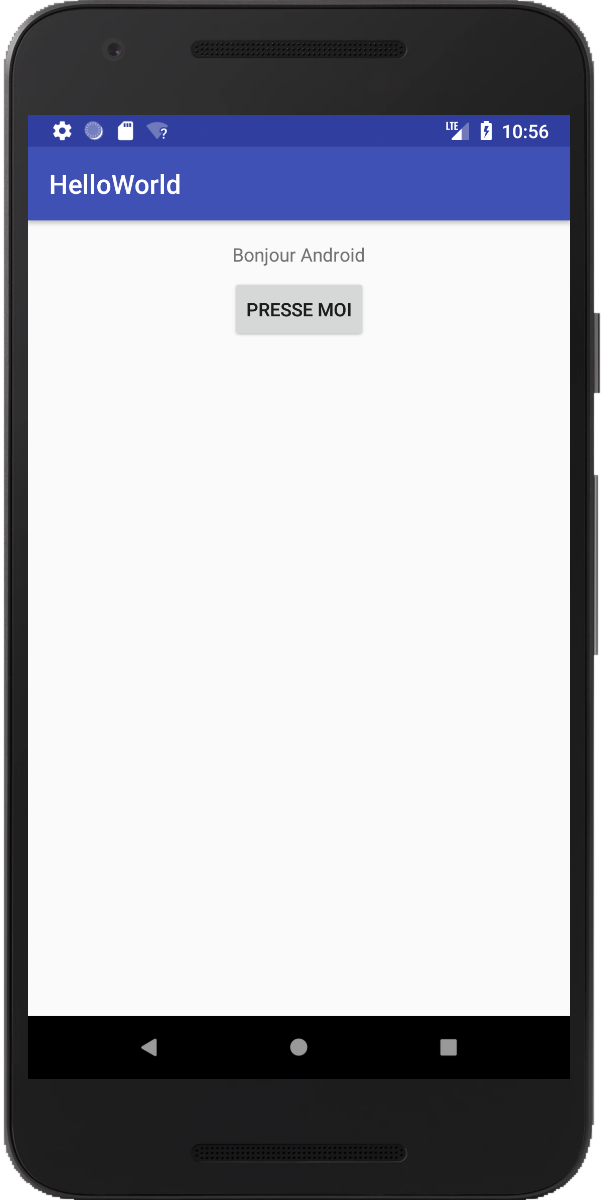
- Launch the application and in the settings in the virtual device, set French (for France) as the primary language and return to the app. Observe that the application (with the exception of it's name which was not changed) now displays text in French
A completed version of this Android Hello World application can be found on GitHub
Further task
Create a new Android application, similar to the one above, but with the addition of an EditText element above the Button. Add functionality so that the TextView displays "Hello World" by default (or its German equivalent if the device language is set to German), "Hello Android" if the button is pressed and the TextView is empty (again with German string provided), but, if the EditText contains user supplied text, display "Hello " followed by the user's name (or the German equivalent). Some further reading (and a translation service) may be required in order to do this.