Fragments
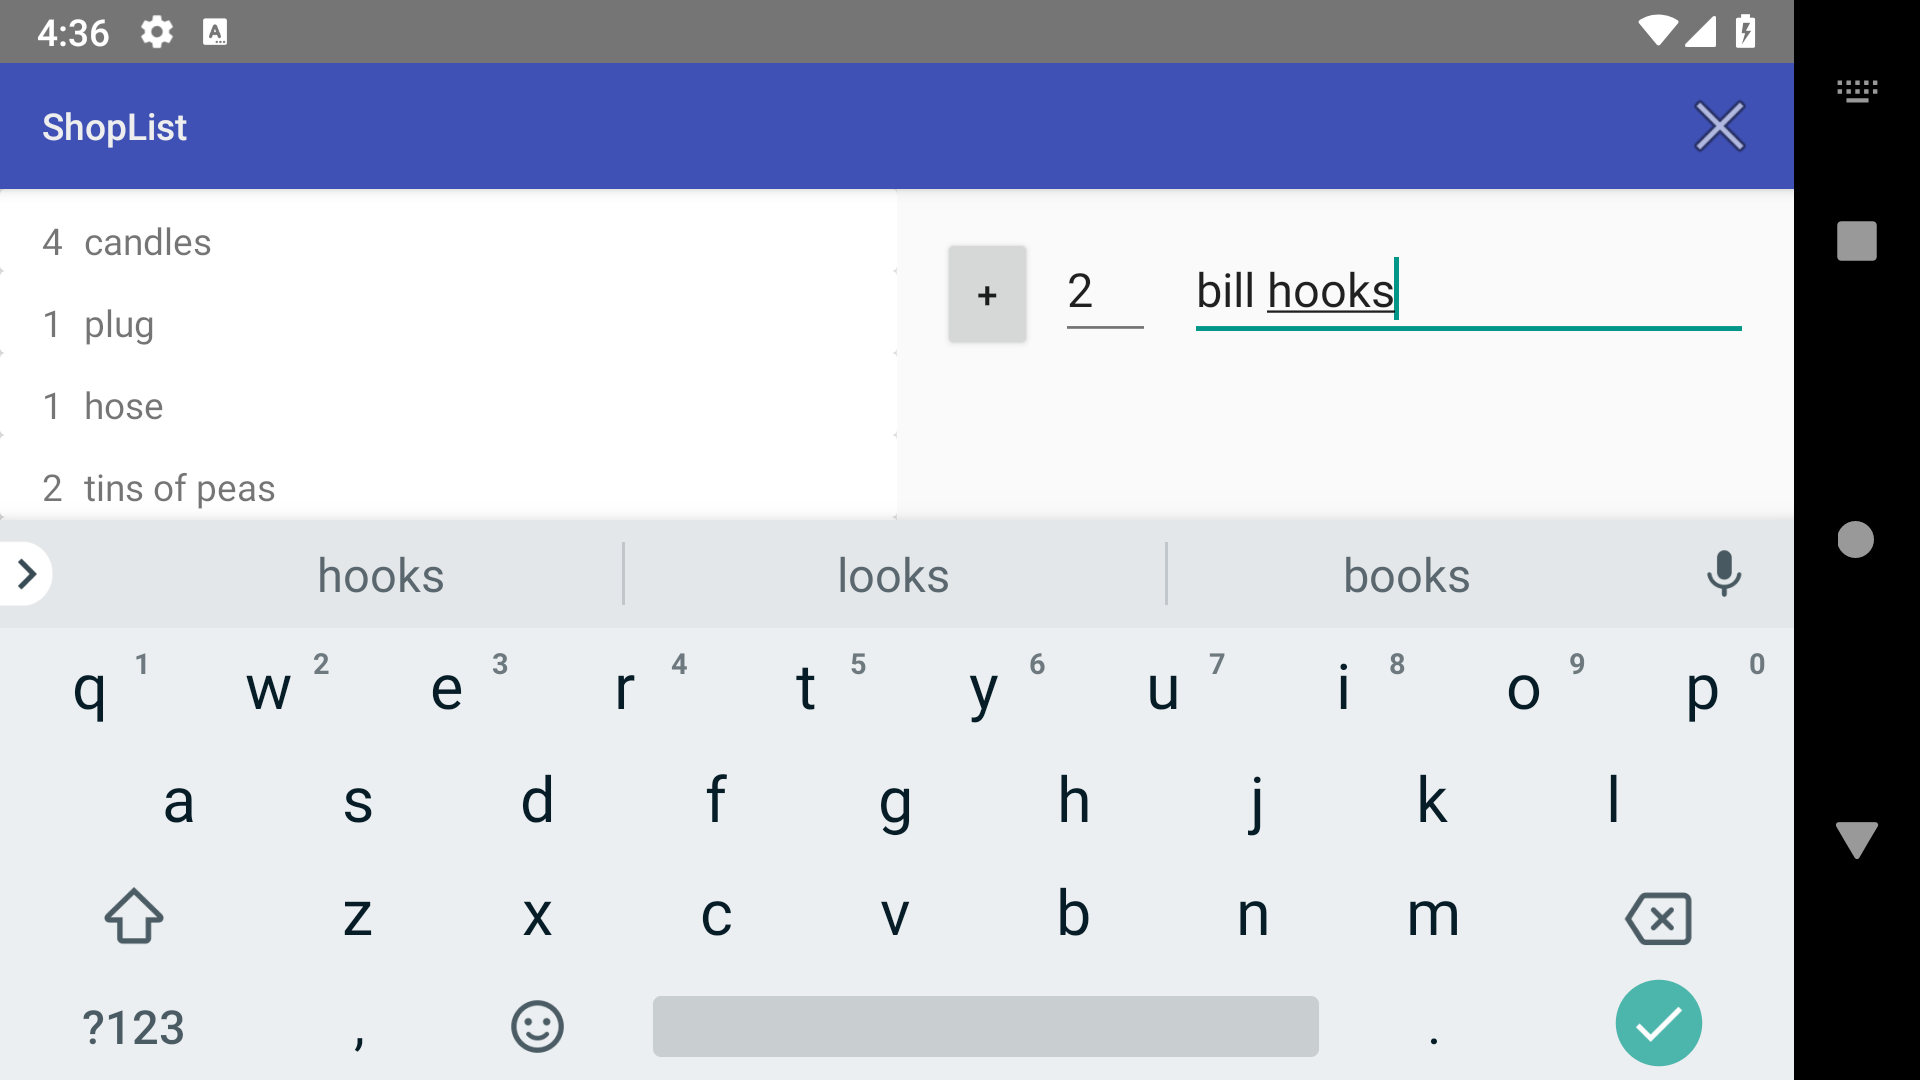
Fragments allow us to reuse elements of code. In this tutorial, we will adapt the RecyclerView application, so that when used in landscape orientation, it can display both the list and the fields for adding a new item, as shown here:
- Make a copy of the completed ShopList application from the RecyclerView tutorial and open it in Android Studio
- Right click on the package folder with your existing Kotlin files in and choose New > Fragment > Fragment (blank)
-
Name the fragment AddItemFragment, but un-check the boxes for including the fragment factory method and interface callbacks as shown below:
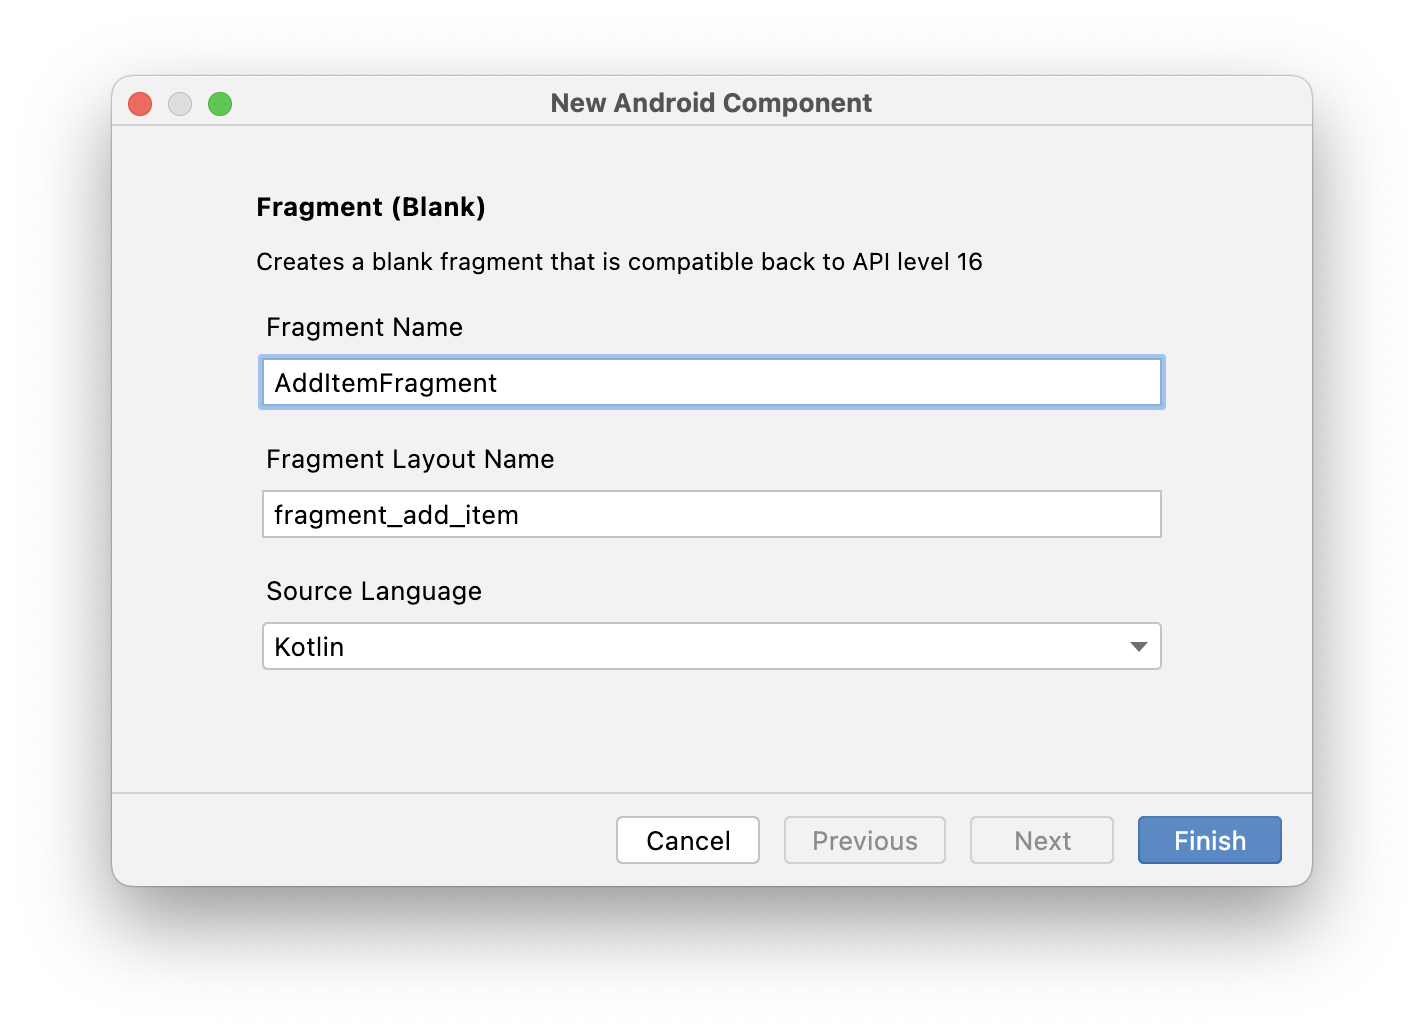
- Once created, you should see files called AddItemFragment.kt and fragment_add_item.xml
- Quite a lot of code is provided in the new Fragment that is not needed. Remove each of the following from the class:
- The properties
- The companion object
- The constants (in the file, but outside the class)
- All the code in onCreate, with the exception of the call to the superclass method
- The companion object
- Any TODO: comments
- Switch to the newly created fragment_add_item.xml file, and remove the contents
- Copy the contents of the activity_add_item.xml file into the fragment_add_item.xml file
- Amend the
tools:contextattribute of the ConstraintLayout, so it reads as follows:tools:context=".AddItemFragment" - Return to the activity_add_item.xml file and remove the Button and both EditText elements
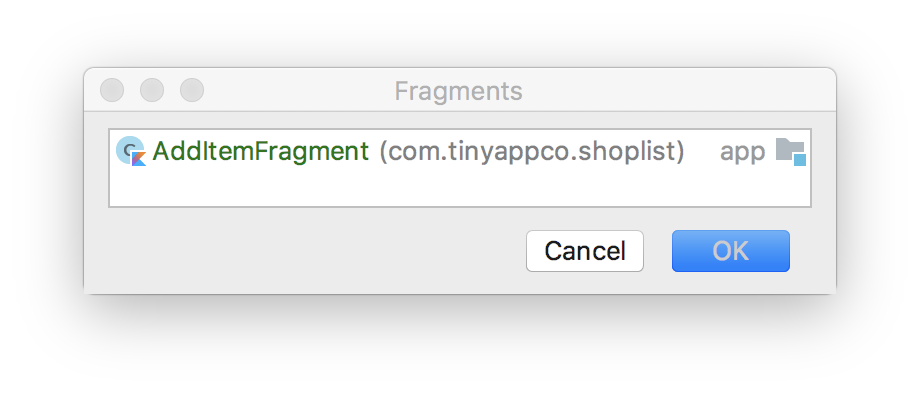
- If you do not already have the designview for the activity_add_item.xml file open, open it and from the Palette, drag a FragmentContainerView into the view
-
When prompted, select the only Fragment available as shown here:
- There should be an error relating to this, as it hasn't got a layout assigned to it and so the designed cannot show a preview. Click the error and it should provide you with a prmpt to set the layout property to the following:
@layout/fragment_add_item. Be aware that this is only for the purpose of the designer preview. It has no effect on the application - Set the fragment to have an id of
frAddItem - If the fragment doesn't appear correctly positioned in the layout ensure that its width and height are set to "match_parent" and it has constraints that constrain its top (and start) to the top of the parent view, e.g.
app:layout_constraintStart_toStartOf="parent" app:layout_constraintTop_toTopOf="parent" - Return to the AddItemFragment.kt file and declare a bindingproperty for the Fragment as you would for an activity - i.e. name it 'binding' and declare it as a FragmentAddItemBinding
- Instantiate the binding in onCreateView using the following code:
binding = FragmentAddItemBinding.inflate(inflater) return binding.root - With the exception of the
onCreatemethod, move the methods, and the inner EnterHandler class, from the AddItemActivity class to the AddItemFragment class. When you paste the methods and inner class, you will be prompted to import various elements. Ensure that the ones that startkotlinxare not selected - Inside the EnterHandler class, the
setResultmethod with be showing an error. This is becausesetResultis a method that belongs to the Activity class. We can amend the error by getting a reference to the underlying activity and calling it using that, modify the line of code so that it reads as follows:activity?.setResult(Activity.RESULT_OK, intent) - Similarly, change the call to
finishso it is called on the activity:
Note that in both cases, these are safe calls (indicated by theactivity?.finish()?. In the event that there was no Activity, the methods would not be called - Some of the code from the onCreate will also need to be moved into the Fragment. As some of it relies on the Activity, it needs to move to the
onViewCreatedmethod (which will need to be added), rather thanonCreateView. Override the theonActivityCreated method in the Fragment - Being careful not to move the call to
setContentView(R.layout.activity_add_item), move the remaining code fromonCreatein the Activity, toonActivityCreatedin the Fragment. If prompted, do not import any of the elements starting withkotlinx - Modify the following code to add the reference to activity and the conditional calls:
Note the extraactivity?.window?.setSoftInputMode(WindowManager.LayoutParams.SOFT_INPUT_STATE_VISIBLE)?after the call togetWindow() - Run the application and add a new item - the behaviour should be unchanged from before the Fragment was added
Making the fragment more reusable
The fragment code is not as reusable as it might be. It creates an intent, finishes the current activity, and passes data back to the previous activity. When we add the Fragment to the landscape orientation of the MainActivity, we will not want this behaviour, instead we would want to update the list directly. One approach to doing this could be to write some logic to check the type of the parent activity and adjust the behaviour accordingly, however that defeats the purpose of trying to make the fragment as reusable as possible. Really what it should do is be able to say "I'm done, here is the data" to any Activity, or indeed another Fragment in which it is nested, to do this, it needs to be designed in a way that will allow it to do that without knowing about where it is. This also helps it conform to the Single Responsibility Principle, as it's only responsibility is to create a new ShoppingListItem instance.
To implement this sort of behaviour, we can create an interface inside the Fragment, and in that we will declare a method which takes a ShoppingListItem as a parameter. Anything implementing that interface would need to implement the method. We'll also create a nullable property in the AddItemFragment class of the type of the interface. When the fragment is created (for example by an activity) if this other class implements the interface, we will set it as that property. When the Fragment has a ShoppingListItem it can make a safe call to the property and pass the ShoppingListItem. Although this probably sounds confusing, it should make more sense once you write the code.
- Add the following interface, inside the AddItemFragment:
interface AddItemFragmentListener { } - Within the interface. declare the following method:
fun onItemAdded(item: ShoppingListItem) - Outside the interface, but still within the AddItemFragment class, add the following property:
Note how this will by null by defaultprivate var addItemListener : AddItemFragmentListener? = null - Next override the
onAttach(context: Context)method and add the following code inside (after the call to super):
This checks if whatever the Fragment is being attached to implements the interface, and, if it does, sets it to be the addItemListenerif (context is AddItemFragmentListener) { addItemListener = context } - The next stage is to make the AddItemActivity implement the new interface. Switch to this class and modify the class declaration so it appears as follows:
class AddItemActivity : AppCompatActivity(), AddItemFragment.AddItemFragmentListener { - Using the prompt, implement the member of the AddItemFragmentListener interface (i.e. the
onItemAddedmethod - Find the code that creates the intent, adds the data as an extra to the intent, sets result and finishes the activity, copy it, then comment it out and and paste it into the
onItemAddedmethod. You may need to remove a call toactivityprefixing theputExtramethod. - The final step is to call this method from within the Fragment. Locate the code you previously commented out, and replace it with the following:
addItemListener?.onItemAdded(product) - Test the application again, and make sure it behaves exactly as before
Moving the RecyclerView to a fragment
Eventually we will create a landscape layout version of the activity_main.xml file, which will show both the RecyclerView and the AddItemFragment side by side. To simplify things, we will move the RecyclerView into a fragment also
- Create a new Fragment called ShopListFragment, and remove the same extra code as ealier, leaving only the onCreate method (with just the call to super.onCreate) and the onCreateView method
- Remove the TextView from the XML
- Add a view binding for the fragment in the same way you did earlier
- Copy the RecyclerView code in the MainActivity and paste it into the newly created Fragment
- Ensure the width and height for both the layout and recyclerview are set to match_parent
- Add the following attribute to the layout element:
xmlns:app="http://schemas.android.com/apk/res-auto" - Comment out (but don't remove) the RecyclerView in the activity_main.xml file (We will use the constraint parameters later)
- In the new Fragment's XML, update the constraint that references the toolbar (which doesn't exist in the Fragment) so it references the parent instead, as follows:
constraintTop_toTopOf="parent" - Move (cut and paste) the
handleDragging()method from MainActivity to the new Fragment - Move the
DragCallbackclass and its methods from Main Activity to the ShopListFragment - Move the
layoutManagerandadapterproperties from Main Activity to ShopListFragment - Move the code that instantiates the adapter and the code that instantiates the layout manager (4 lines in total) to
onViewCreatedin ShopListFragment. - The line of code that instantiates the layout manager will show an error as the constructor requires an activity, but
this(i.e. the Fragment) is being passed. Modifythisto readactivity - Move the call to
handleDragging()intoonViewCreated - Remove the
privateaccess modifier from the declaration ofadapter
Adding the ShopListFragment to the MainActivity
- Open activity_main.xml, and in the design view, drag a FragmentContainerView to replace where the RecyclerView was. When prompted choose the ShopListFragment
- Set the layout property to @layout/fragment_list (you may need to look at the warnings for the container view to find the option to do this)
- Copy the constraints and sizing from the commented out RecyclerView
- Set the id of the Fragment to
frList - In MainActivity, create a lateinit instance variable to represent the ShopListFragment, as follows:
private lateinit var listFrag: ShopListFragment - Next, in
onCreate()add code to instantiate the above instance variable with the fragment, casting it as a ShopListFragment as follows:listFrag = supportFragmentManager.findFragmentById(R.id.frList) as ShopListFragment - Review MainActivity.kt for calls to
adapter(probably highlighted in red) and prefix each call withlistFrag. - There is another problem, in that the call to
loadList()cannot take place until the adapter is initialised, but this now happens after the activity is created. To solve this problem, override theonStart()method in MainActivity and move it to there - Test the application, it will work to some extent, but there is a problem -
loadListis called when we return to the activity from the AddItemActivity, and replaces the list with the one from disk! - To solve this, we move the entire
loadList()method to the ShopListFragment. - The
openFileInput()method is part of Activity, so prefix this method call withactivity?.(Note this is a safe call, but we should be confident that Activity exists) - Remove the code that was previously modified to reference
listFrag, as we are now in that class - In the call to
makeToast, replace the call tothiswithactivity - Because
fileInputStreamis now a nullable object, modify the call toclose()on it, to be a safe call, as follows:fileInputStream?.close() - Add a call to
loadList()in theonViewCreatedmethod - Remove the entire
onStart()method from MainActivity - In a similar manner to how the
loadList()method has been added, move thesaveList()method to the ShopListFragment - Remove the two calls to
saveList()from MainActivity - Add calls to
saveList()in the ShopListFragment'sonSaveInstanceState()andonPause()methods - Finally, remove any unused import statements
- Run the application and it's behaviour should be unchanged from when you started the tutorial!
Creating the landscape UI
So that we can see the real power of fragments, we want to create a landscape version which will display both the list and the add item fragment at the same time. to start, we need to create a landscape specific layout.
- Open the activity_main.xml file in design view, and using the menu click the name of the activity, and in the drop down choose create landscape qualifier.
- In the landscape view, drag a new fragment in, to the right of the list, set the layout property so a preview is displayed and give it an id of frAddItem
- Getting this layout is a bit tricky. one way to do it is to use a linear layout and place the two fragments inside. Example code for the whole activity XML is Either using this code, or another layout, ensure that the fragments appear side by side, occupying the full height and half width of the activity
here, click to expand
<?xml version="1.0" encoding="utf-8" ?> <androidx.constraintlayout.widget.ConstraintLayout xmlns:android="http://schemas.android.com/apk/res/android" xmlns:app="http://schemas.android.com/apk/res-auto" xmlns:tools="http://schemas.android.com/tools" android:layout_width="match_parent" android:layout_height="match_parent" tools:context=".MainActivity"> <androidx.appcompat.widget.Toolbar android:id="@+id/toolbar" android:layout_width="0dp" android:layout_height="?android:attr/actionBarSize" android:background="?attr/colorPrimary" android:minHeight="?attr/actionBarSize" android:elevation="4dp" android:theme="?attr/actionBarTheme" app:layout_constraintEnd_toEndOf="parent" app:layout_constraintStart_toStartOf="parent" app:layout_constraintTop_toTopOf="parent" /> <LinearLayout android:layout_width="0dp" android:layout_height="0dp" android:baselineAligned="false" app:layout_constraintBottom_toBottomOf="parent" app:layout_constraintEnd_toEndOf="parent" app:layout_constraintStart_toStartOf="parent" app:layout_constraintTop_toBottomOf="@+id/toolbar"> <androidx.fragment.app.FragmentContainerView android:id="@+id/frList" android:name="com.tinyappco.shoplist.ShopListFragment" android:layout_width="0dp" android:layout_height="match_parent" tools:layout="@layout/fragment_shop_list" android:layout_weight="1" /> <androidx.fragment.app.FragmentContainerView android:id="@+id/frAddItem" android:name="com.tinyappco.shoplist.AddItemFragment" android:layout_width="0dp" android:layout_height="wrap_content" android:layout_weight="1" tools:layout="@layout/fragment_shop_list"/> </LinearLayout> </androidx.constraintlayout.widget.ConstraintLayout> - We no longer need the 'add' button in the menu when the device is in landscape mode, so add code in onCreateOptionsMenu, after the menu is inflated, to check orientation and hide button when landscape as follows:
if (resources.configuration.orientation == Configuration.ORIENTATION_LANDSCAPE){ binding.toolbar.menu.findItem(R.id.menu_insert).isVisible = false } - The code to check orientation is clunky. It would be nicer if Activity had a method to do this. Add an extension method (in the Extensions.kt file) to do this, and then refactor the code you've just added to use it:
fun Activity.isLandscape() : Boolean { return this.resources.configuration.orientation == Configuration.ORIENTATION_LANDSCAPE } - Run the application and check the add button is hidden in landscape mode
Handling callbacks from the AddItemFragment
In the same way the we made the AddItemActivity implement the AddItemFragmentListener interface, we can do the same for the MainActivity.
- Implement the interface and add the associated
onItemAddedmethod - add the following code to add the item to the listViewsAdapter:
listFrag.adapter.addItem(item) - If we were to run the code now, we'd discover that they keyboard doesn't get dismissed and we can't see the list. Add the following code to the
onItemAddedmethod:val manager = getSystemService(Context.INPUT_METHOD_SERVICE) as InputMethodManager manager.hideSoftInputFromWindow(window.decorView.rootView.windowToken, 0) - Run it now and we can add new items, though the EditText field is not cleared after adding a new one, and in some circumstances the entry will be added twice
- Items appear twice if a hardware keyboard is used to press enter, as the onEditorAction method gets called twice for some reason, both times with the 'ENTER' key event. Because we only call the listener if the EditText has valid content, this will resolve the issue, although it is more of a workaround than a proper solution. (If you happen to discover the underlying cause of the problem let me know...)
- Modify the AddItemFragment to clear the text field once the listener has been called - you should be able to figure out how to do this without the code being provided
- Run the app again and verify the newly added item is cleared from the edit text after being added
- There is one further issue, which is that Android opts to use the full screen editor for the text fields which prevents the user from being able to increment the count once the item name field is selected. Add the following attribute to the XML for both EditText attributes in the AddItemFragment:
android:imeOptions="flagNoExtractUi" - The count of items is also not reset to 1 after adding a product with a higher count, fix this bug
You can download a version of the ShopList app that supports rotation from GitHub
Additional task
The add item fragment could be used for collecting a quantity of any item (not just a shopping item). Modify the code so it is more generic. This means that it shouldn't depend on the ShoppingListItem class, and that the placeholder text from the item name should be customisable
We have had to expose the adapter outside the fragment. This is unwise, it should be encapsulated, refactor the code so that the adapter is private - you will need to add methods to the fragment to handle to changes to the adapter
Advanced Task
Add functionality, such that when an item is long-pressed, and edit dialogue appears and allows them to change the item and count. As a bonus, consider handling changes to the plurality of the item if the count is changed to, or from, a value of one. Watch our for products like potatoes (or sheep).