List Views
Within many applications there is a requirement to display lists of items. One of the simplest ways to do this in Android is to use a ListView, which works well for small sets of data that don't change very often. For other scenarios a RecyclerView is likely to be a better, more efficient choice, but for the purposes of this tutorial we will use a ListView
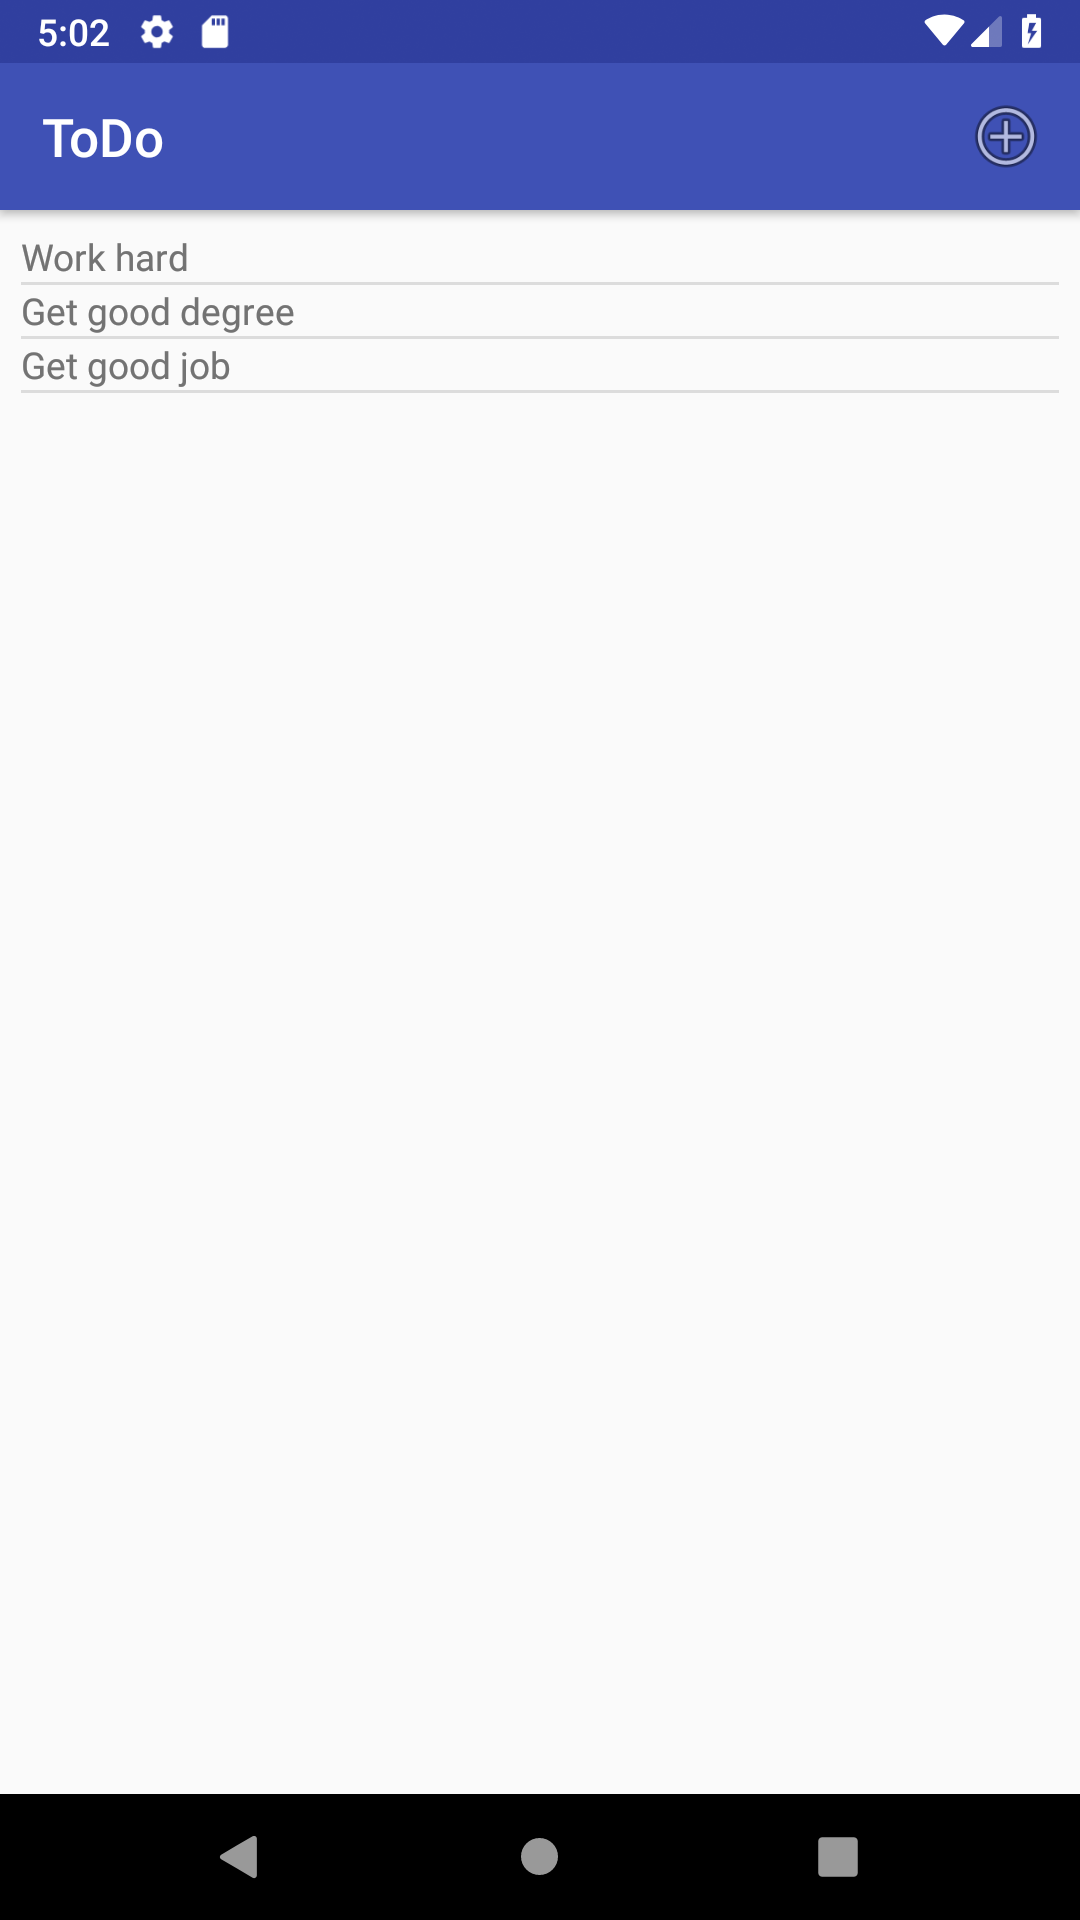
This tutorial will use a list view to keep track of a simple to-do list like the one shown here:
Setting up the main activity UI
- Create a new application in Android Studio called 'ToDo', for Phone and Tablet (API 21 is fine) with a Basic Views Activity as the starting point, leaving it with the default name
- Open the module level build.gradle file and check that the following code already appears inside the
androidelement so that ViewBinding is available:buildFeatures { viewBinding = true }If it does not appear, add it.
- A basic activity provides us with a menu, which by default includes a option for settings. Open the res/menu/menu_main.xml file and remove this existing menu item (either by deleting it from the design view, or by removing the
itemelement from the XML - Add a new menu item, set the id to "menu_insert", the title to a string resource with the text "Add new task", the icon to "@android:drawable/ic_menu_add" and the showAsAction property to ifRoom|withText. This can either be done in the design view, or by setting the XML as follows:
In either case, verify that the above XML appears as an element between the opening and closing menu tags. If you copy the XML, be sure to create a corresonding String resource<item android:id="@+id/menu_insert" android:icon="@android:drawable/ic_menu_add" android:title="@string/add_new_task" app:showAsAction="ifRoom|withText" /> - Because we have removed a menu item which was referenced in MainActivity.kt, locate this file, and remove the line of code shown below
It should be easy to identify as the missing resource it references should appear in redR.id.action_settings -> true - The basic activity (from Android Studio 4) also includes some fragments which are not needed. To remove them, open content_main.xml and remove the fragment element (including all its attributes)
- Next remove the onSupportNavigateUp method from MainActivity.kt
- Now remove the following three lines of code from the MainActivity's onCreate method:
'val navController = findNavController(R.id.nav_host_fragment_content_main) appBarConfiguration = AppBarConfiguration(navController.graph) setupActionBarWithNavController(navController, appBarConfiguration) - Remove the line that declares the
appBarConfigurationobject - Remove any unused import statements (these will be in grey at the top of the the activity)
- Open the module level build.gradle file, and remove the two dependencies that refer to androidx.navigation
- Next remove the two fragment XML files, the two fragment activities (Kotlin files) and the nav_graph.xml file (from inside the navigation resource folder)
- Finally, in the activity_main.xml file, slect the <include> element in the component tree and set it's id to 'content'
- Run the application and check that it appears and shows an insert button on the menu bar
- The basic activity also includes a floating action button (with an id of 'fab') and associated code (this appears as a round button with an envelope icon). Open activity_main.xml and remove this using either the design or XML view
- Return to MainActivity.kt and remove the code that creates the onClickListener for the floating action button you've just removed (four lines of code including the closing brace)
- Verify the app runs and the action button no longer appears
Adding an activity to create new tasks
- Add a new empty activity called "TaskEditActivity"
- Return to MainActivity.kt and add the following variable to which will be used to launch and handle responses from the TaskEdit activity:
private val resultLauncher = registerForActivityResult(ActivityResultContracts.StartActivityForResult()) { result -> //todo: handle result } - Add the following method which can be used to start the TaskEdit Activity
Importprivate fun createTask(){ val intent = Intent(this,TaskEditActivity::class.java) resultLauncher.launch(intent) }android.content.Intentas required - This activity should be triggered by the menu_insert button, so modify the code in the
onOptionsItemSelected()method as follows:override fun onOptionsItemSelected(item: MenuItem): Boolean { return when (item.itemId) { R.id.menu_insert -> { createTask() true } else -> super.onOptionsItemSelected(item) } } - Run the application and check that when the add button is pressed, the new empty activity appears
- Open TaskEditActivity and add a view binding inside the class as follows:
private lateinit var binding : ActivityTaskEditBinding - Replace the call to
setContentView()inside the onCreate method with the following code to setup the binding:binding = ActivityTaskEditBinding.inflate(layoutInflater) val view = binding.root setContentView(view) - Open activity_task_edit.xml and add an EditText element (labelled Plain Text in the Pallette) and a button beneath it
- Remove the existing text from the EditText and set the hint property to a String resource with the value "Task"
- Set the button's text to a string resource with the value "Save"
- Set the button's onClick attribute to "onSaveClick", which is the name of a method we will add later
-
Verify that the layout looks similar to that shown.
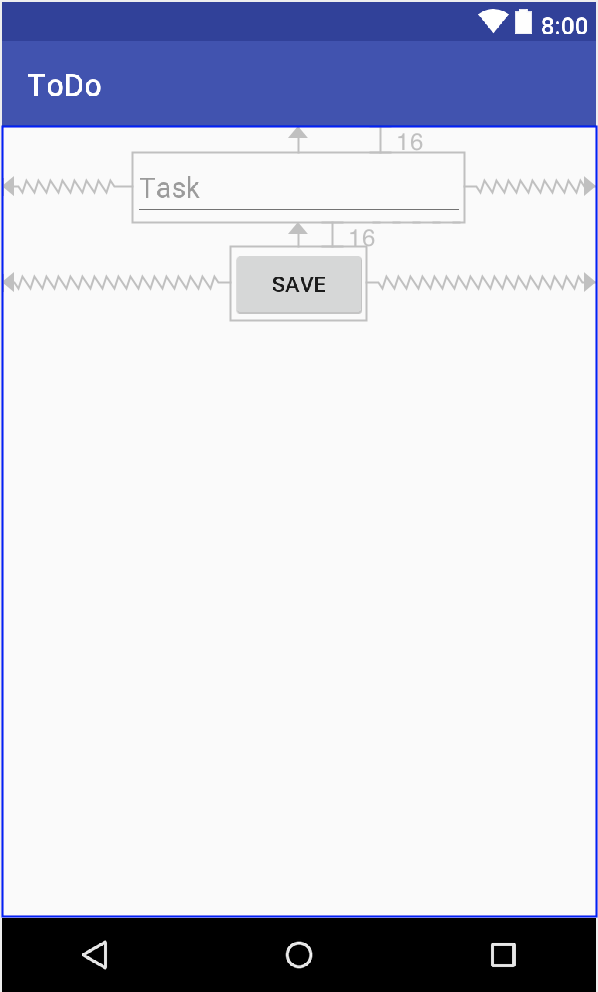
The XML can also be seen here (click to expand)
<android.support.constraint.ConstraintLayout xmlns:android="http://schemas.android.com/apk/res/android" xmlns:app="http://schemas.android.com/apk/res-auto" xmlns:tools="http://schemas.android.com/tools" android:layout_width="match_parent" android:layout_height="match_parent" tools:context=".TaskEditActivity"> <EditText android:id="@+id/editText" android:layout_width="wrap_content" android:layout_height="wrap_content" android:layout_marginTop="16dp" android:ems="10" android:hint="@string/task" android:inputType="textPersonName" app:layout_constraintEnd_toEndOf="parent" app:layout_constraintHorizontal_bias="0.502" app:layout_constraintStart_toStartOf="parent" app:layout_constraintTop_toTopOf="parent" /> <Button android:id="@+id/button" android:layout_width="wrap_content" android:layout_height="wrap_content" android:layout_marginTop="16dp" android:onClick="onSaveClick" android:text="@string/save" app:layout_constraintEnd_toEndOf="parent" app:layout_constraintStart_toStartOf="parent" app:layout_constraintTop_toBottomOf="@+id/editText" /> </android.support.constraint.ConstraintLayout> - The next stage is to add the functionality to the TaskEditActivity. Add the following method stub, adding the appropriate import statement for android.view.View:
fun onSaveClick(view: View){ } - Add the following code to the new method to create an intent, and pass the text from the editText element back to the MainActivity as an Extra in the intent and then notify the activity that it's finished and should be closed as follows:
Add import statements as requiredval intent = Intent() intent.putExtra("task_text", binding.editText.text.toString()) setResult(Activity.RESULT_OK, intent) finish()
Setting up the list view
- Open the content_main.xml file
- From the legacy section of the palette, add a ListView to the activity such that it fills the screen. Set or infer constraints as required and set the id to 'listView'
- Add a new Layout resource to the res/layout folder named list_layout. Set the Root element to TextView (If you don't set the root element when the dialogue box appears, you'll need to remove the ContraintLayout provided)
As you may have gathered, everytime we add a task a string will be created, so the data source for our list view will be a simple collection of strings (such as List<String>). In order to get the text to appear in the list, we need to connect the list view with the ArrayList. To do this we can use an
ArrayAdapter. The constructor for ArrayAdapter takes the following parameters:- context (i.e. the current activity)
- The resource Id for the layout for each item in the list
- A list of objects (in our case it will be the MutableList<String>
private val listItems = mutableListOf<String>() private lateinit var adapter: ArrayAdapter<String>-
Add the following code to the
onCreatemethod (adding the import statement when reqired):adapter = ArrayAdapter<String>(this,R.layout.list_layout, listItems) binding.content.listView.adapter = adapter - The final stage is to ensure that when the TaskEditActivity finishes, the list and listview are updated. Revisit the declaration of the
resultLaunchervariable and replace the//todo...statenent with the following
Add the import statement for Activty as promptedif (result.resultCode == Activity.RESULT_OK) { val task = result.data?.getStringExtra("task_text")!! listItems.add(task) adapter.notifyDataSetChanged() } - Run the application and verify that you can add items to the list
Removing items from the list
So far we can add items to the list, but they cannot be removed (short of restarting the application). It would be handy to provide a delete option if we press and hold on an item
- Add a new Menu resource file called longpress.xml in the res/menu folder
- Set the title property to a string resource with the text of "Delete" and set the id to menu_delete. The resulting XML should look like this:
<?xml version="1.0" encoding="utf-8"?> <menu xmlns:android="http://schemas.android.com/apk/res/android"> <item android:id="@+id/menu_delete" android:title="@string/delete" /> </menu> - In MainActivity.kt, add the following code to the
onCreatemethod to enable context menus for the listview:registerForContextMenu(binding.content.listView) - Next, override the
onCreateContextMenumethod as follows to display the meny item following a long pressoverride fun onCreateContextMenu(menu: ContextMenu?, v: View?, menuInfo: ContextMenu.ContextMenuInfo?) { super.onCreateContextMenu(menu, v, menuInfo) menuInflater.inflate(R.menu.longpress, menu) } - Next, add the following method which will remove an item from the ArrayList<String> given an item from the menu
Add the import statement as required. Note that the position of the menu item will match the index of the item in the ArrayList making removal trivialprivate fun deleteTask(item: MenuItem){ val info = item.menuInfo as AdapterView.AdapterContextMenuInfo listItems.removeAt(info.position) adapter.notifyDataSetChanged() } - Finally, override the
onContextItemSelectedmethod to call the deleteItem method when the appropriate context menu item is selected:override fun onContextItemSelected(item: MenuItem?): Boolean { when(item.itemId) { R.id.menu_delete -> { deleteTask(item) return true } } return super.onContextItemSelected(item) } - Test the application, adding a few items, and verify they can be removed using a long press and the menu item that appears
A completed version of this project is available on GitHub
Additional tasks
Implement functionality so the programme retains the items in the list when it is terminated (consider using ObjectOutputStream)