Preferences
This tutorial adds a setting to the ShopList app created in the RecyclerViews tutorial, and adapted in the Fragment's tutorial. Whilst the functionality could be included in the version of the app that doesn't use Fragments, this tutorial will reference files in the version that does.
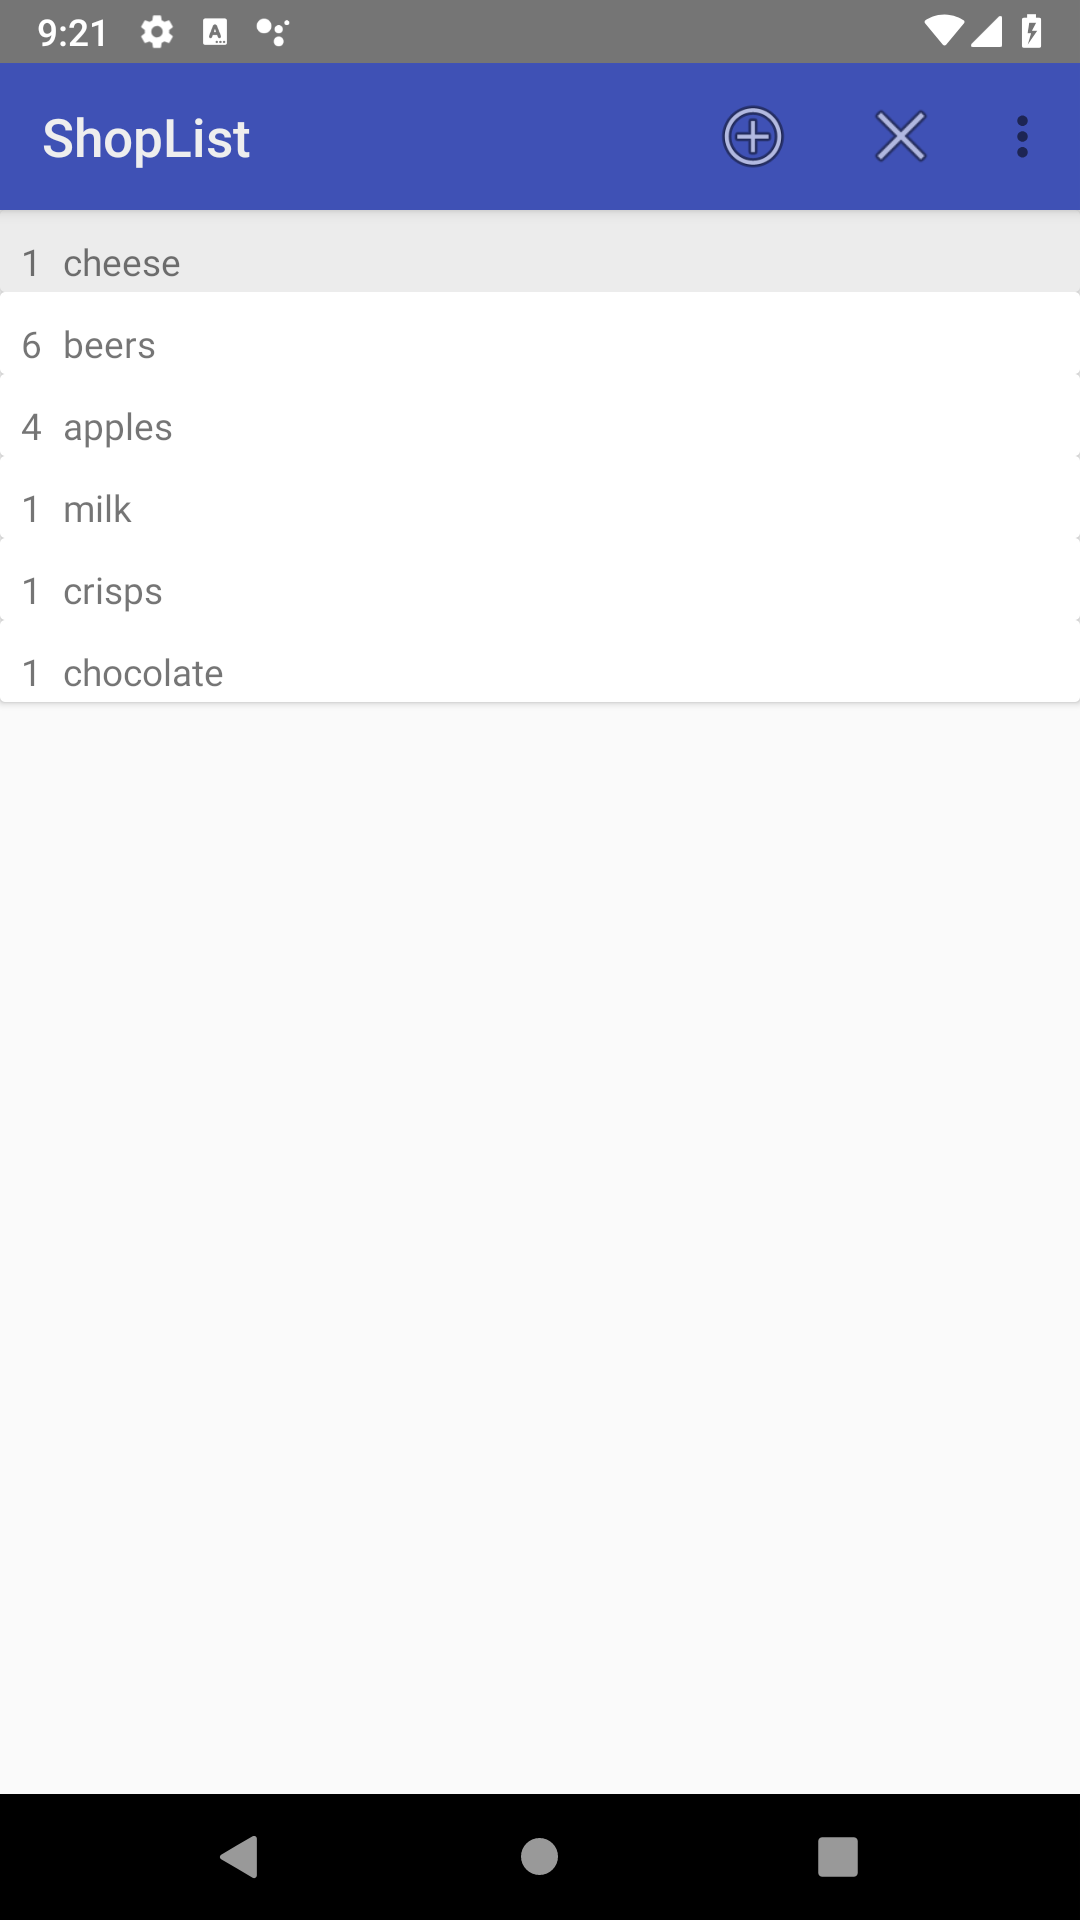
In the app so far, when we add one of any item to the shopping list, it doesn't always make sense when displayed, for example if we add 'cheese' to the shopping list, it displays a '1 cheese'. Some, but not all users might like to hide the count when it is one. In order to facilitate this, we can add a settings screen to our application where the user can determine whether this functionality should be enabled or not
Creating the settings
- Take a copy of the application having completed the Fragments tutorial and open it in Android Studio
- If it does not already exist create a folder named xml inside the 'res' folder in your application
- In that folder, add a new XML resource file named preferences.xml and set the root element to android.preference.PreferenceScreen
- Check the XML within the newly created folder appears as follows:
Within this screen we can define various settings as needed by the application, they can even be grouped, however we only need a single application, with a setting which can be turned on and off, so we will use a SwitchPreference to do so<?xml version="1.0" encoding="utf-8"?> <androidx.preference.PreferenceScreen xmlns:android="http://schemas.android.com/apk/res/android"> </androidx.preference.PreferenceScreen> - Add the following code inside the PreferenceScreen element:
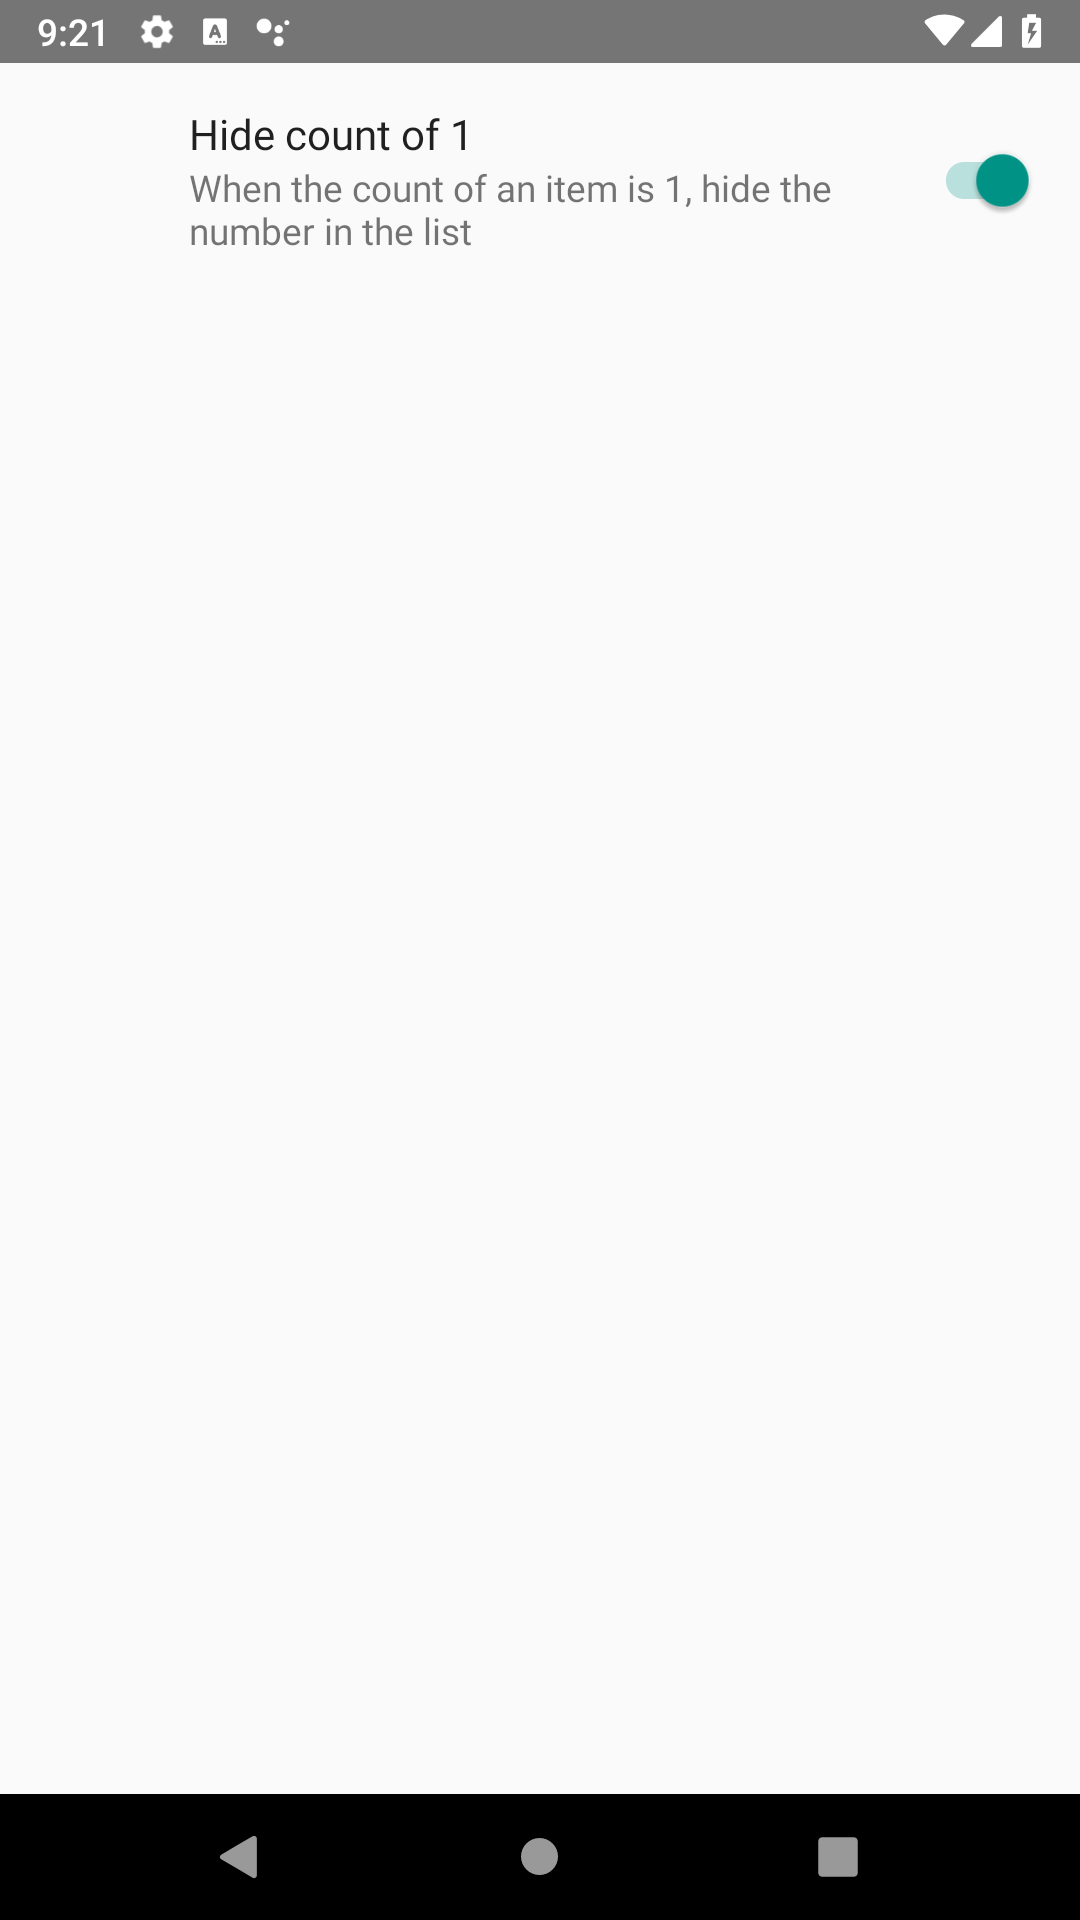
You can read more about creating preferences in the Android documentation<SwitchPreference android:key="hide_single_count" android:title="@string/hide_count_1" android:summary="@string/hide_count_1_description" android:defaultValue="false" /> - The string resources for the title and summary are as follows - add them to your string.xml file:
<string name="hide_count_1">Hide count of 1</string>
<string name="hide_count_1_description">When the count of an item is 1, hide the number in the list</string>
Settings Fragment
Android makes it easy to display settings, we can programmatically create a Fragment which will automatically provide a layout for the settings defined in the preferences XML file. This makes use of a backwards compatibility library, which must add to the project first
- Open the build.gradle file for the app, and within the dependencies section add the following line:
implementation 'androidx.preference:preference:1.1.1' - You should be prompted with a message saying that gradle files have changed, so click the sync now button link
- Although Android Studio allows us to create a Fragment using the menu, it provides a lot of boilerplate code. Instead create a new Kotlin class called SettingsFragment, and make it extend PreferenceFragmentCompat as follows:
class SettingsFragment : PreferenceFragmentCompat() { } - Within it, override the
onCreatePreferences method - If the parameter names are listed as
p0andp1in the above method, rename them tosavedInstanceStateandrootKeyrespectively - Add the following code within the method:
This is all that is needed to create a Fragment that displays user preferences.setPreferencesFromResource(R.xml.preferences,rootKey)
Settings Activity
As we will want to display the settings fragment in its own Activity, we need to create an activity which just holds the Fragment
- Using the menu, add a new empty activity named SettingsActivity, but make sure that the layout file is not also generated as we will not need one
- In the
onCreateactivity, add the following code:
This replaced the content of the Activity with that of the SettingsFragment. Other than writing code to load the Activity, this is all that is needed to display settings in an Android appsupportFragmentManager.beginTransaction().replace(android.R.id.content, SettingsFragment()).commit()
Displaying settings
We now need to provide a way for the user to access the settings. You may recall from the RecyclerView tutorial, that we actually removed a settings menu! Now we will add one back again
- Open menu_main.xml and add the following item inside the menu element:
<item android:id="@+id/action_settings" android:orderInCategory="100" android:title="@string/action_settings" app:showAsAction="never" /> - If necessary, add a String resource with the name "action_settings" with the value of "Settings"
- Now open the MainActivity.kt file and add the following code inside
onOptionsItemSelected(item: MenuItem): Boolean, which will launch the settings activity when the menu button is pressed:if (item.itemId == R.id.action_settings){ val intent = Intent(this,SettingsActivity::class.java) startActivity(intent) } - Run the application. Using the menu, select settings and verify that the preference Activity (and Fragment) is displayed and that the switch appears and can be toggled (ensure you leave the switch in the 'off' state however). Use the Android back button to return to the main app screen
Applying the settings
Although the settings can be changed, they don't yet affect the running of the application.
- Open the RecyclerAdapter class, and within the
onBindViewHolder()method, after theitemvariable is declared, add the following code:
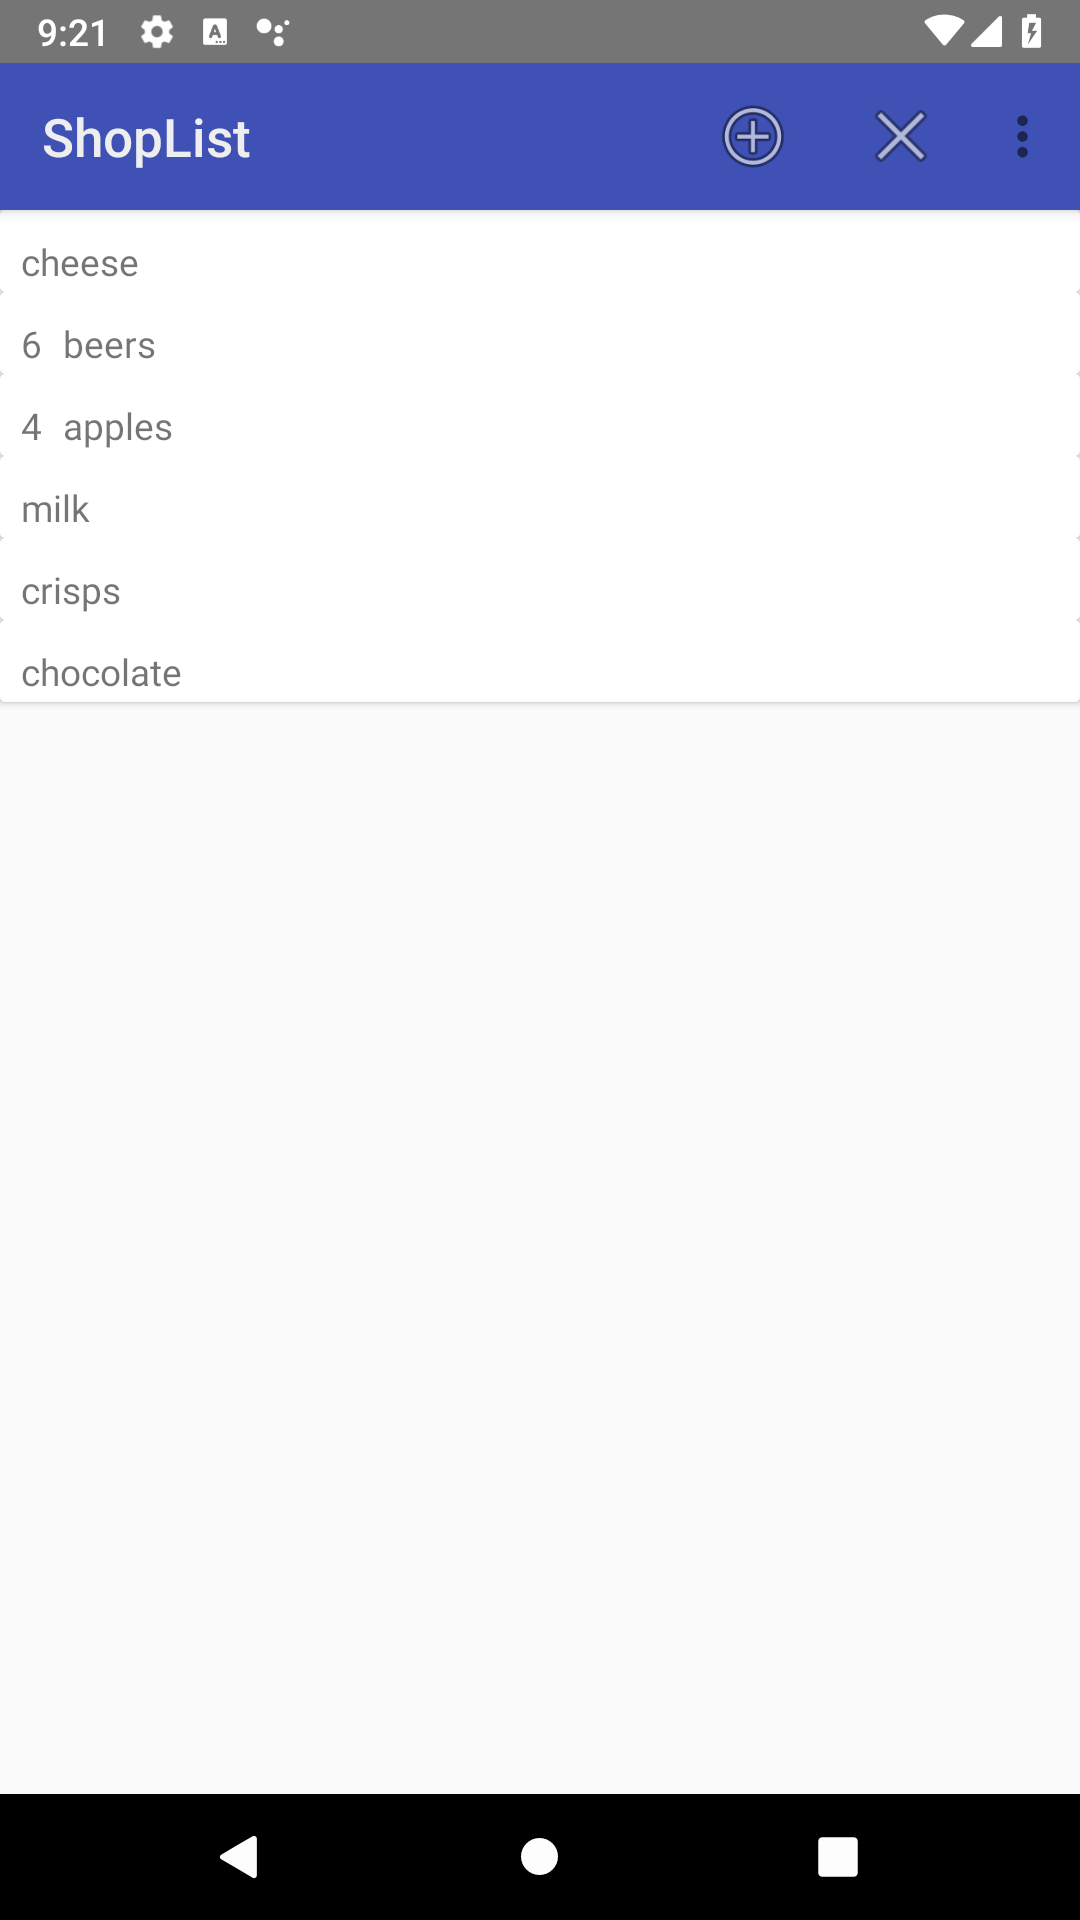
Note that the first two lines access the shared preferences and get the Boolean value associated with the "hide_single_count" key (which we declared in the preferences.xml file earlier). The final line switch determine the visibility of the TextView which displays the count. Note that we useval prefs = PreferenceManager.getDefaultSharedPreferences(holder.itemView.context) val hideSingleCount = prefs.getBoolean("hide_single_count",false) if (item.count == 1 && hideSingleCount){ cardView.tvCount.visibility = View.GONE } else { cardView.tvCount.visibility = View.VISIBLE }View.GONEand notView.INVISIBLEso no space is consumed when it is hidden. It's also important to ensure that we don't just use the View.GONE statement, as when recycling a ViewHolder, we may need to change a previously 'Gone' View to be visible again - Run the application again, ensure you that you have a mix of items in the list, some with a count of 1, and some with a higher count.
- Toggle the settings switch to 'on'. At this stage you're unlikely to see the change, unless you add new a new item with a count of one, as the recycler view does not auto,atically re-bind its data
- To ensure the recyclerview rebinds its data (and applies the changes) create the following listener to the RecyclerAdapter:
var prefsChangedListener = SharedPreferences.OnSharedPreferenceChangeListener { sharedPreferences, key -> notifyDataSetChanged() } - The listener also has to be registered. Override the following method in the RecyclerAdapter class to do that
override fun onAttachedToRecyclerView(recyclerView: RecyclerView) { super.onAttachedToRecyclerView(recyclerView) PreferenceManager.getDefaultSharedPreferences(recyclerView.context).registerOnSharedPreferenceChangeListener(prefsChangedListener) } - Test the application again, and change the preference switch, the change should be effective every time you return to the MainActivity
Tidying up the layout
You may have noticed that the margins differ on the count TextView and the item name TextView.
- In card_layout.xml set the start and left margins of the tvCount TextView to 8dp, and the end and right margins to 0dp
- Set the left and start margins of the tvProduct TextView to 8dp
- Test the application again and you should see that the products with a count of 1 are aligned with the count of products with a different number
A completed version of this task can be found on GitHub
Further task
- Implement a menu option which will allow the user to copy the list (in text format) to the clipboard, so they could paste it into another message. This will require some research
- Implement functionality that will allow a user to paste a copied list of items (that may or may not include product counts) into the app