SQLite Database
This tutorial will introduce you to the use of SQLite databases within an Android application by building an application to track assignment deadlines
Setting up the project
- The project will have two classes for the data (with corresponding tables in the database). The first of these will represent modules (simply a module code and a name), and the second will represent assignments which will comprise of a title, weight, deadline, module and id. One module can have multiple assignments.
- Start by creating a new Android App named 'Deadlines' with Kotlin support, targeting API 14 and later, with an Empty Activity (leaving it with the default name)
- Setup view binding in the usual way
- Open the activity_main_xml and delete the existing TextView
-
Add a ListView which fills most of the screen, with a button at the bottom, as shown here:
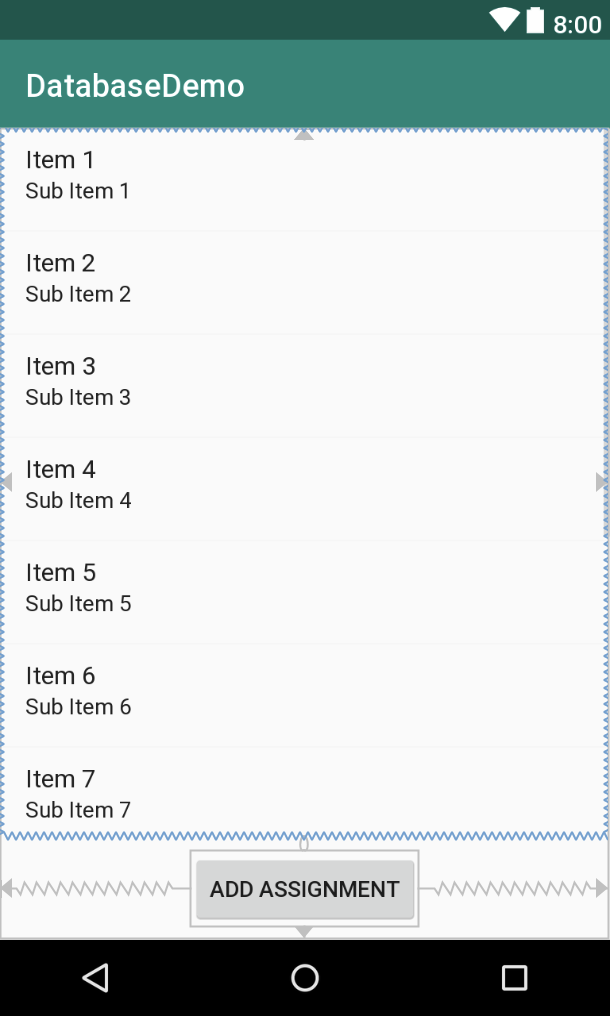
- Set the id of the ListView to "listView"
If you are struggling with the layout, you can see an example here (click to expand>
<ListView android:layout_width="0dp" android:layout_height="0dp" app:layout_constraintEnd_toEndOf="parent" app:layout_constraintBottom_toTopOf="@+id/btnAddAssignment" app:layout_constraintTop_toTopOf="parent" app:layout_constraintStart_toStartOf="parent" android:id="@+id/listView" /> <Button android:text="Add Assignment" android:layout_width="wrap_content" android:layout_height="wrap_content" android:id="@+id/btnAddAssignment" android:layout_marginTop="8dp" android:layout_marginBottom="8dp" app:layout_constraintTop_toBottomOf="@+id/listView" app:layout_constraintEnd_toEndOf="parent" app:layout_constraintStart_toStartOf="parent" app:layout_constraintBottom_toBottomOf="parent" />- Open MainActivity.kt and add an empty stub for the
addAssignmentmethod as follows:fun addAssignment(){ } - In the
onCreatemethod set an onclickListener for the button which calles theaddAssignmentmethod
Creating the additional Activities
Module List
- Add a new empty activity named ModuleListActivity. This will be used to display a list of modules which a used can select to edit
- Setup a view binding named
bindingfor this in the usual way, note that the binding class will be called ActivityModuleListBinding - Open the associated xml file and add a ListView so it fills the screen (set width and height to match_parent)
- Set the id of the ListView to "listView"
Module Details
- Add a new empty activity named ModuleDetailActivity. This will be used to add and edit the details relating to an individual module
- Setup view binding, again naming the binding
binding -
The layout for this should consist of the following elements, one below each other in the following order:
- An EditText with the id of 'etCode', and the hint as "Module Code e.g. CO5225" (convert the String to a String resource)
- An EditText with the id of 'etTitle', and the hint as "Module Name" (again make it a String resource)
- A button
- A TextView with the id of 'tvError'
- Set the text size for each of the edit text elements to 18sp, and set them to the full width of the activity (with a 8dp margin all round)
- Set the text view to the full with of the activity (Again with an 8dp margin)
- Switch to the corresponding Kotlin file for the activity, and add an empty function called
addModule. - In
onCreateset an onClickListener for the button to it calls theaddModulemethod
Assignment Details
- Add another empty activity called AssignmentDetailsActivity. This will be used to add a new assignment deadline
-
Add the following elements to the screen, laying them out as shown: Spinner, Button, EditText, EditText, DatePicker, Button
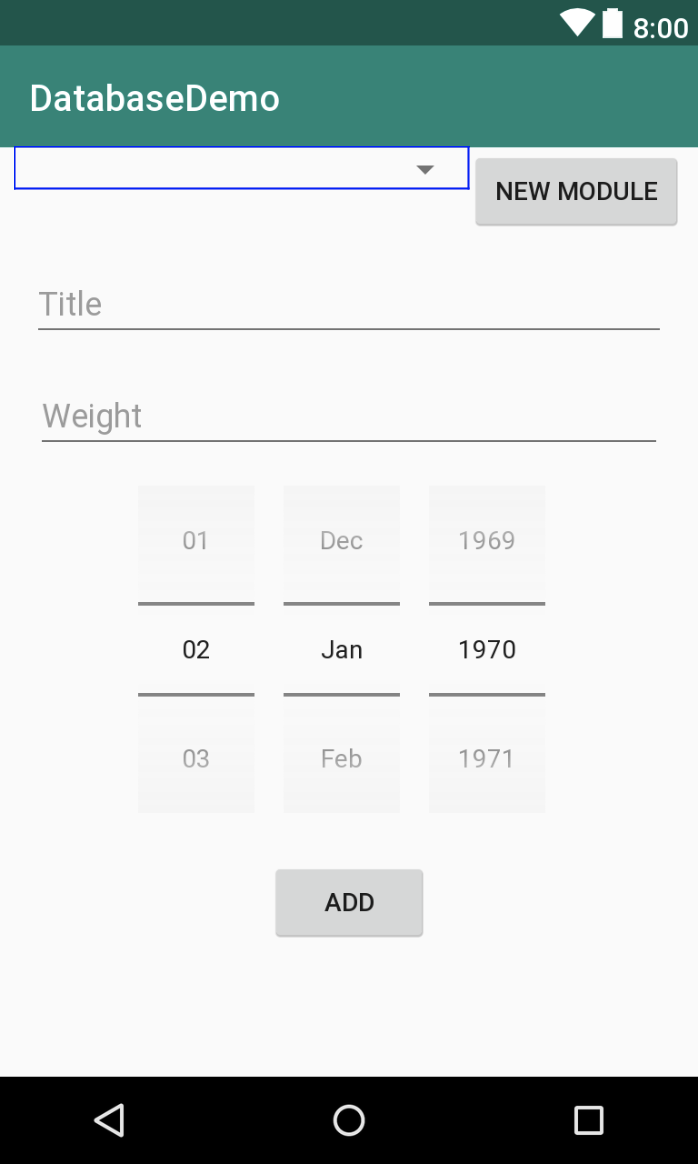
- The id for the Spinner should be 'spinner'
- The first button does not need an id, but should have an onClick value of "addModule"
- The ids for the EditText elements should be 'etTitle' and 'etWeight' respectively
- The Weight Edit text should be configured with the 'number' input type
- The id of the DatePicker should be 'datePicker'
- Add an attribute named "android:datePickerMode" to the DatePicker and set its value to "spinner"
- The final button should have an id of "btnAdd" and an onClick value of "addAssignment"
- Switch to the corresponding Kotlin file and add methods for both buttons' onClick values (each taking a parameter of type View), with no implementation
- Setup view binding for this activity also
Creating the menus
- Next add a new resource directory called 'menu' to the res folder. This will be the menu on the toolbar which allows the user to modify existing modules
- Add a new menu resource file within that new folder called menu_settings
- Within the newly added file add a single menu item with the title "Edit Modules" and the id "menu_edit_modules"
- Create a String resource for the title
- Add another menu resource (in the same folder) called menu_deadlines_context. This will act as a context menu for list of deadlines displayed in a ListView in the main activity
- Add two menu items to this menu, the first with the id of "menu_edit" and the title of "Edit" and the second with the id of "menu_delete" and the text of "Delete"
- Create String resources for the above named titles
- The third menu will be used as a context for a list of modules, providing a way for the user to remove a module. Add a final menu resource (again in the same folder) named menu_modules_context and add a single menu item with the id of "menu_module_delete" and the text "Delete" - you should reuse the pre-existing String resource for this string.
- Open the MainActivity and delete the existing TextView
Creating the model
Next we'll create classes to represent the constructs of the Module and Assessment
Module class
- Add a new Kotlin class called Module to the application
- Define both its properties in the primary constructor as follows:
class Module (val code: String, var name: String){ } - For the purposes of the app we will display modules using a list view, so to make things convenient when we come to do that, we will override the
toStringmethod of Module so it displays the module code followed by a colon, a space and then the module title. Add this code to do that:override fun toString(): String { return "$code: $name" } - We'll be passing the details relating to a module using an Intent, so modify the code so that it implements the Serializable interface
- Finally, we want to be able to order modules by their code, so implement the Comparable<Module> interface also, so that sorting would take place based on the module code. The final module code (minus package declaration) would appear as follows:
import java.io.Serializable
class Module (val code: String, var name: String) : Comparable<Module>, Serializable {
    override fun compareTo(other: Module): Int {
        return code.compareTo(other.code)
    }

    override fun equals(other: Any?): Boolean {
        if (other is Module){
            return code.equals(other.code)
        }
        return super.equals(other)
    }

    override fun toString(): String {
        return "$code: $name"
    }
}
Assignment class
- Add a new Kotlin class called Assignment to the application
- Declare the properties in the primary Constructor as follows:
class Assignment(var id: Int?, var title:String, var weight: Int, var deadline: Date, var module:Module){ } - As before mark the class as conforming to Serializable
- Implement Comparable<Assignment>, so that the sort would take place using the date property
- Override
toString()so that the deadline would appear in the following format dd/mm/yy CO5225 Assignment title (25%). Hint - format the date using an instance of the SimpleDateFormat class
The SQLite Database
The application we are building will persist data in a SQLite database on the Android Device (or emulator). Rather than include SQL statements througout the various Activities in the application, we will create a class with responsibility for creating, retrieving, updating and deleting data from the SQLite database, as well as creating the tables we need on first run.
- Add a new Kotlin class called DataManager
- Set the primary constructor for the class to take an object of type 'Context' named 'context', e.g.
class DataManager(context: Context) {} - Within the class add the following statement which will provide us with an instance of a SQLite database that we can interact with in code:
private val db : SQLiteDatabase = context.openOrCreateDatabase("Assessment", Context.MODE_PRIVATE, null) - Add an
initblock to the code, beneath the above statement, and add the following code (which may be copy and pasted):
The first two statements are queries which will generate tables for the Modules and Assignments respectively when executed, and the second two lines execute the code. Take the time to read the code to understand the structure of the two tablesval modulesCreateQuery = "CREATE TABLE IF NOT EXISTS `Modules` ( `Code` TEXT NOT NULL, `Name` TEXT NOT NULL, PRIMARY KEY(`Code`) )" val assignmentsCreateQuery = "CREATE TABLE IF NOT EXISTS `Assignments` ( `Id` INTEGER NOT NULL PRIMARY KEY AUTOINCREMENT, `Title` TEXT NOT NULL, `Weight` INTEGER NOT NULL, `Deadline` INTEGER, `ModuleCode` TEXT )" db.execSQL(modulesCreateQuery) db.execSQL(assignmentsCreateQuery) - Before we can add assignments, we need to be able to add a module, (as an assignment belongs to a module). Add the following method which will take a Module object as a parameter and add it to the database:
fun add(module: Module){ val query = "INSERT INTO Modules (code, name) VALUES ('${module.code}', '${module.name}')" db.execSQL(query) } - We'll also want to be able to retrieve a list of modules. The code for this is slightly more complicated. When we execute the query, a 'Cursor' object is returned. This acts a bit like an iterator and allows us to move through records in the database. It starts by moving to the first record (if possible) and continues while it is able to read them. We can then retrieve data using the column name. Once we've extracted the appropriate values from a row in the table, we use them to instantiate a Module object and add it to a collection, which is returned once we've finished iterating through the table's rows. Add a method to do this as follows:
We will return to the class later to add more functionality, but for now we'll return to a couple of the activities within the app to try out the newly added methodsfun allModules() : List<Module>{ val modules = mutableListOf<Module>() val cursor = db.rawQuery("SELECT * FROM Modules", null) if (cursor.moveToFirst()) { do { val code = cursor.getString(cursor.getColumnIndexOrThrow("Code")) val name = cursor.getString(cursor.getColumnIndexOrThrow("Name")) val module = Module(code,name) modules.add(module) } while (cursor.moveToNext()) } cursor.close() return modules.sorted() }
Adding a module
- The user's journey through the app will take them from the MainActivity (where they will view deadlines), to a screen to add a new deadline (Assignment Details Activity), and from there if required, to the ModuleDetailActivity. In order to do that we need to add intents to a couple of methods. Firstly, locate the
addAssignmentmethod in MainActivity and create write code to create an Intent for the AssignmentDetailsActivity class, then start an Activity using the intent as the parameter. - In AssignmentDetailsActivity, locate the
addModulemethod, and add code (similar to that above) to navigate to the ModuleDetailActivity - Run the application, and verify that you can navigate from the MainActivity, to the ModuleDetailActivity, via the "Add Module" Assignment Details Activity
- Open ModuleDetailActivity and add the following method which we will use to check that a module code is valid (a module code requiring two uppercase letters, a number between 4 and 7 and any further 3 numbers. We will use a regular expression to check this:
private fun validateModuleCode(code: String) : Boolean{ val regEx = "([A-Z]{2})([4-7])([0-9]{3})" return code.matches(Regex(regEx)) } - The Activity will need to call methods using an instance of the DataManager class, so add the following instance variable to the class:
private lateinit var dataManager : DataManager - Instantiate the dataManager object in the
onCreatemethod (after the call to super) as follows:dataManager = DataManager(this) - Next add code to the
addModulemethod to create a module object using the values in the editText elements and use the dataManager object to add it to the database:val code = binding.etCode.text.toString() if (validateModuleCode(code)) { val module = Module(binding.etCode.text.toString(), binding.etTitle.text.toString()) dataManager.add(module) finish() }else { binding.tvError.text = "Module code should be two upper case letters followed by four numbers" } - Convert the String literal to a String resource
- Run the application and add a new Module with the code CO5225 and the title Programming II
- Verify that the previous activity is shown once the module is added
- Next try and add the same module again. Verify that the application terminates and within the output (you may have to look for it), you can see the following output (bear in mind the app may restart, so check the 'Run' output Window):
Caused by: android.database.sqlite.SQLiteConstraintException: UNIQUE constraint failed: Modules.Code (code 1555 SQLITE_CONSTRAINT_PRIMARYKEY)
This appears because we cannot add the same module twice - To avoid this, return to the DataManager class, and add the following method which will locate a module, given a module code:
private fun module(code: String) : Module? { val query = "SELECT * FROM Modules WHERE Code='$code'" val cursor = db.rawQuery(query,null) return if (cursor.moveToFirst()) { val name = cursor.getString(cursor.getColumnIndexOrThrow("Code")) cursor.close() Module(code,name) } else { cursor.close() null } } - Next modify the DataManager's
add(module: Module)method, so it checks that the module doesn't already exist (by calling the method we just added, and checking the returned value is null) before trying to add it - Modify the further so that if a module with that code already exists it returns false, and if it doesn't exist, it returns true (after adding it)
- Return to the ModuleDetailActivity's
addModulemethod, and modify it so it appears as follows:fun addModule(v: View){ val code = binding.etCode.text.toString() if (validateModuleCode(code)) { val module = Module(binding.etCode.text.toString(), binding.etTitle.text.toString()) if (dataManager.add(module)) { finish() } else { binding.tvError.text = "Unable to add module, does the module already exist?" } }else { binding.tvError.text = "Invalid Module code" } } - Add a String resources as required
- Run the application again and verify that you are warned if you try and add a module you've already added
Viewing the modules
Viewing the modules is not a primary aspect of the application, but it is necessary if the user wishes to modify them, and it would be useful to us to verify that the modules we've added are actually in the database. The list will be accessible via a menu on the MainActivity.
- Navigate to the MainActivity and override the
onCreateOptionsMenumethod as follows:menuInflater.inflate(R.menu.menu_settings, menu) return super.onCreateOptionsMenu(menu) - Next override the
onOptionsItemSelectedmethod so that if the user selects the 'Edit Modules' option, we start the ModuleListActivity activity. the code to do this is as follows:override fun onOptionsItemSelected(item: MenuItem): Boolean { if (item.itemId == R.id.menu_edit_modules){ val intent = Intent(this,ModuleListActivity::class.java) startActivity(intent) } return super.onOptionsItemSelected(item) } - Verify that the menu appears and the activity changes when the menu item is selected, although at this stage the activity will be empty
- Open the ModuleListActivity and add the following instance variables to the class:
private lateinit var modules : Listprivate lateinit var dataManager: DataManager - In
onCreateinstantiate the dataManager object (as you did in the ModuleDetailActivity class) - Add another method which will retrieve the modules from the DataManager instance configure the listView with the modules as follows:
private fun refreshList(){ modules = dataManager.allModules() binding.listView.adapter = ArrayAdapter<Module>(this,android.R.layout.simple_list_item_1,modules) } - Call this new method from within
onCreate() - Run the app and verify that you can view the list of modules using the menu option from the MainActivity
Showing a list of modules for an Assignment in a Spinner
In order that the user can select a module to which an assignment belongs, we will populate the spinner with a list of all modules
- Firstly, the AssignmentDetailsActivity needs access to the data manager. In the same way you created an instance of DataManager for the ModuleDetailActivity, create one for AssignmentDetailsActivity. Don't forget to instantiate it in the
onCreatemethod - Add an additional property to the AssignmentDetails class as follows:
private lateinit var modules : List<Module> - In the same class, add a method as follows, which will retrieve all the modules using the DataManager, create an ArrayAdapter using some simple layouts available in Android, and set the new adapter as the Spinner's adapter.
private fun refreshSpinner(){ modules = dataManager.allModules() //if you've used a different name for the dataManager, change the reference here (and in future code that uses this name) val adapter = ArrayAdapter<Module>(this,android.R.layout.simple_spinner_item, modules) adapter.setDropDownViewResource(android.R.layout.simple_spinner_dropdown_item) binding.spinner.adapter = adapter } - Add a call to this new method at the end of the
onCreatemethod - Run the app and verify that you can select from a list of modules (the ones you added previously)
- Add a new module, then return to the AssignmentDetailsActivity and verify that that it doesn't appear in the Spinner
- Restart the app and verify that the newly added module appears
- To fix this, override the
onResumemethod and add a call torefreshSpinner() - Verify that newly added modules appear in the spinner immediately.
DatePicker convenience
Somewhat unhelpfully, the data picker object doesn't provide us with a Date object, instead, it gives us year, month and dayOfMonth values, from which we have to calculate a date. Add an extension method to your code (this can go anywhere outside of an existing class, but I would suggest a new Kotlin file called Extensions.kt would be a sensible location) as follows:
fun DatePicker.date() : Date{
    val cal = Calendar.getInstance()
    cal.set(year,month,dayOfMonth)
    return cal.time
}Adding an assignment
- First we'll add code to the data manager to add a new assignment, so open the DataManager class
- The code for adding an assignment is somewhat similar to adding Module, except for the deadline field, we use the 'time' property of the Date object, which returns a long integer, and we use the 'code' property of Assignment's module property. Add a method as follows:
fun add(assignment: Assignment) { val query = """INSERT INTO Assignments (Title, Weight, Deadline, ModuleCode) VALUES ('${assignment.title}', '${assignment.weight}', ${assignment.deadline.time}, '${assignment.module.code}')""" db.execSQL(query) } - Return to the AssignmentDetailsActivity method, and add the following code to the existing
addAssignmentmethodsval title = binding.etTitle.text.toString() val weight = binding.etWeight.text.toString().toInt() val date = binding.datePicker.date() val selectedModule = modules[binding.spinner.selectedItemPosition] val assignment = Assignment(null, title, weight, date, selectedModule) dataManager.add(assignment) finish() - Run the application, you should be able to add an assignment, but it will not be displayed. (If you need to hide the keyboard, because the 'Add' button is obscured, simply use the back button (which should have rotated to appear as a down arrow)
Displaying deadlines
- At present we cannot view all deadlines. Firstly we need a method to retrieve these from the database. We'll be making a few different queries of the assignments, so add a method to the DataManager class which will take a query as a parameter, and return assignments that match as follows:
private fun assignments(query: String, args: Array<String>?) : List<Assignment>{ val assignments = mutableListOf<Assignment>() val cursor = db.rawQuery(query,args) if (cursor.moveToFirst()) { do { val id = cursor.getInt(cursor.getColumnIndexOrThrow("Id")) val title = cursor.getString(cursor.getColumnIndexOrThrow("Title")) val modCode = cursor.getString(cursor.getColumnIndexOrThrow("ModuleCode")) val weight = cursor.getInt(cursor.getColumnIndexOrThrow("Weight")) val dateLong = cursor.getLong(cursor.getColumnIndexOrThrow("Deadline")) val date = Date(dateLong) val assignment = Assignment(id, title, weight, date, module(modCode)!!) assignments.add(assignment) } while (cursor.moveToNext()) } cursor.close() return assignments.sorted() } - Next add a method that will call this, passing a query for all Assignments, as follows:
fun assignments() : List<Assignment>{ val query = "SELECT * FROM Assignments" return assignments(query, null) } - Return to MainActivity and add a reference to the DataManager class (as you've done twice before, ensuring it's instantiated in
onCreate - Add another property to represent the assignments as follows:
private lateinit var dataSet : List<Assignment> - Add a method as follows to refresh the ListView with the current set of assignments
private fun refreshDeadlines(){ dataSet = dataManager.assignments() binding.listView.adapter = ArrayAdapter<Assignment>(this,android.R.layout.simple_list_item_1,dataSet) } - Add a call to this method in onCreate
- Override
onResumeand add a call torefreshDeadlinesthere also - Run the app and ensure that deadlines that are added appear in MainActivity
Deleting deadlines
- We will use a context menu (i.e. a menu displayed with a long press) to provide users with the functionality to delete a deadline. In MainActivity, override the
onCreateContextMenumethod and inflate the 'menu_deadlines_context' menu you created earlier - In
onCreateadd the following code so the ListView can use the context menu:registerForContextMenu(binding.listView) - In order to be able to use the 'delete' option in this menu, we need to implement a delete function in the DataManager class. Open this class and add the following function:
Note that parameters are represented by questions marksfun delete(assignment: Assignment){ if (assignment.id != null) { val whereClause = "Id = ?" val whereArgs = arrayOf(assignment.id.toString()) db.delete("Assignments", whereClause,whereArgs ) } }?in the where clause, and parameters are provided as a list of strings - Return to the MainActivity class and override the
onContextItemSelectedmethod, with the following implementation:if (item.itemId == R.id.menu_delete){ val info = item.menuInfo as AdapterView.AdapterContextMenuInfo val component = dataSet[info.position] dataManager.delete(component) refreshDeadlines() return true } return super.onContextItemSelected(item) - Verify that long-pressing on a deadline and selecting the delete item deletes it
Deleting modules
- In order to delete modules, we must be able to check for, and delete deadlines which belong to a module. Before we add a method to delete Modules from the database, open the DataManager class, add a method to which will locate deadlines for a given modules as follows:
private fun assignmentsForModule(module: Module) : List<Assignment>{ val query = "SELECT * FROM Assignments WHERE ModuleCode = ?" return assignments(query, arrayOf(module.code)) } - Next add another method which will check for and delete any assignments, before deleting the module as follows:
fun delete(module: Module){ //check for assignments and delete these first val moduleAssignments = assignmentsForModule(module) for (assignment in moduleAssignments){ delete(assignment) } db.delete("Modules","Code = ?",arrayOf(module.code.toString())) } - Next add code to the ModuleListActivity so the modules context menu is added, (remember to register the list view for the context menu) and so that it deletes the selected module. The code will be similar to the above code used to delete assignments
- Run the app and ensure you have a module with a deadline associated to it
- Delete the module, and verify that the module, and associated deadline(s) are removed
Updating modules
- Rather than deleting modules if there is an error with the title, it would be advantageous to be able to update it. To enable this, start by adding the following code to the DataManager class:
fun update(module:Module){ val contentValues = ContentValues() contentValues.put("Name", module.name) val args = arrayOf(module.code) db.update("Modules",contentValues,"Code = ?", args) } - In order to avoid having two very similar activities, one for adding a module, and another for editing, we will reuse the ModuleDetailActivity for editing, passing a module via an intent. Add the following instance variable to the ModuleDetailActivity class:
private var existingModule : Module? = null - Next add the following code at the end of the
onCreatemethod:val module = intent.getSerializableExtra("module") if (module is Module) { existingModule = module binding.etTitle.setText(module.name) binding.etCode.setText(module.code) bindinng.etCode.isEnabled = false //can't change code as primary key - delete module instead binding.button.text = "Update" } - Change the String literal to a String resource
- The code in addModule will now become slightly more complex. Firstly we need to check if the existingModule is not null. In some circumstances we could write the if statement, and make use of a smart cast inside the braces of the if statement, however this is not possible where the value might change between the check and being used, which is the case here, as
existingModuleis an ivar, so could be modified by something else. Instead we will take a copy and use that. Add the following code to the existingaddModulemethod, such that all the code currently within the method moves into theelseblock, as denoted by the comment:val immutableExistingModule = existingModule if (immutableExistingModule != null){ immutableExistingModule.name = binding.etTitle.text.toString() dataManager.update(immutableExistingModule) finish() } else { //existing code should go here } - Switch to the ModuleListActivity and add the following to the
onCreatemethod so that the user can view the details of a module when he/she taps on one:listView.onItemClickListener = AdapterView.OnItemClickListener { _, _, position, _ -> val module = modules[position] val intent = Intent(this,ModuleDetailActivity::class.java) intent.putExtra("module",module) startActivity(intent) } - Run the app and check you can edit the name of a module - note that you will need to restart the app to view the changes
- Override
onResumefor the ModuleListActivity so that the changes to a module name update immediately
Updating an assignment
-
The same principles can be applied to edit an assignment as were used to edit a module. Implement code in the DataManager, AssignmentDetailsManager and MainActivity to add this functionality. There are two tricky aspects of this as follows:
-
Instantiating the date picker with a pre-determined date, example code to help with this is shown here:
val cal = Calendar.getInstance() cal.time = assignment.deadline datePicker.init(cal.get(Calendar.YEAR), cal.get(Calendar.MONTH), cal.get(Calendar.DAY_OF_MONTH), null) - Pre-selecting the correct module in the spinner. This can be done with the spinner's
setSelection()method however, as this requires an index value, you will need to find out how to find the index of the assignment's module in theassignmentsArrayList.
-
Instantiating the date picker with a pre-determined date, example code to help with this is shown here:
- Run the application, check that you can edit an assignment, and that when doing so, the spinner correctly shows the module for the assignment
A completed version of this project can be found on GitHub
Tasks
- The insertions to the database are made using the
execSQL()method. Modify the code to use theupdate()methods - Add functionality so only deadlines that have not yet passed are shown.
- Add functionality to calculate the number of days between deadlines and display these
- Add validation so that the total weighting for assignments for the same module cannot exceed 100
- Add a preference so the user can specify a number of days which can elapse before a deadline is no longer shown
- The use of the
refreshDeadlinesmethod for changes to the data set (e.g. following deletion) is sub-optimal. Modify the code to hand deletions and edits more eloquently
Additional Tasks
- Enhance the layout of the deadlines by using a RecyclerView instead of a ListView
- Implement notifications so the app will notify the user at the time of the deadline (or in advance)