Using a GridView to edit and delete data
This tutorial assumes you have completed the GridViews tutorial, and have the completed project open in Visual Studio.
- Using the disclosure indicator on the GridView, choose the Configure datasource option. Click next to confirm the connection string and on the "Configure the Select Statement" screen click the "Advanced button", check both boxes in the dialogue box that appears as shown below:
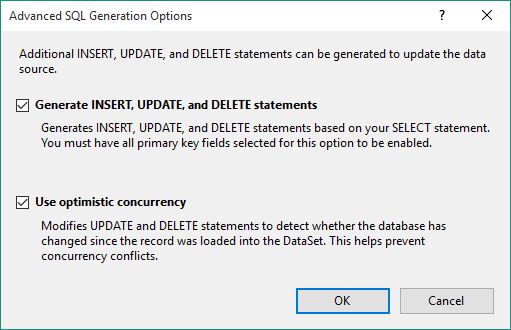 This will generate SQL statements allowing edit and delete operations to take place
 - Click OK, then "Next" and then "Finish" to close the dialog box
-
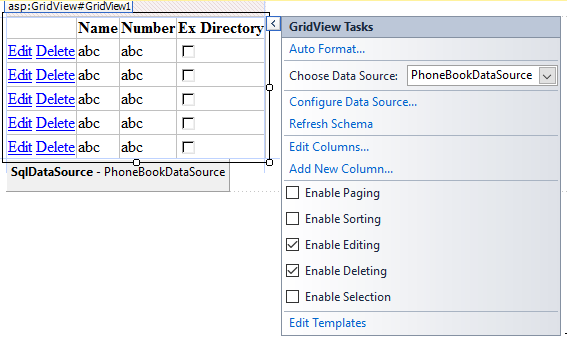
Using the gridview pop-out menu, enable editing and deletion as shown below:
- Run the application and you should be able to edit and delete records
- Finally to increase the accessibility of the website, we should change the Edit and Delete 'links' to buttons, which more accurately indicates their function. Use the pop-out menu and choose to edit the fields for the grid view, and for the CommandField, change the ButtonType to Button.
Editing records is not always the most convenient or straight forward within a gridview - it may be fine for simple edits, such as a title or price field, but for longer descriptions it is unwieldy. Generally GridViews should therefore generally be used for viewing and deleting records.