Gridviews
Creating a GridView
A Gridview relies on a database table to show and optionally edit and delete data. This tutorial will use a simple phone directory as the concept for the gridview
-
Create a database and add a table to it using the following field names and data types:
Name Data Type Notes Id Int Identity, Auto Increment, Do not allow Nulls Name nvarchar(50) Do not allow nulls Number nvarchar(11) Do not allow nulls ExDirectory bit Do not allow nulls - Set the Id field to be the Primary Key and save the table. If you refresh the view, you should see the table in the list within the SQL Object Explorer window
-
Populate the table with the following data (the Id should be automatically assigned), true or false may be replaced with 1 or 0:
Name Number ExDirectory Andrew 01234567890 True Sarah 07894561230 True Dan 07123456789 False Michelle 09876543210 False - On a new page in an existing or new ASP.NET web forms application, expand the 'Data" section of the toolbox and drag a GridView onto the page
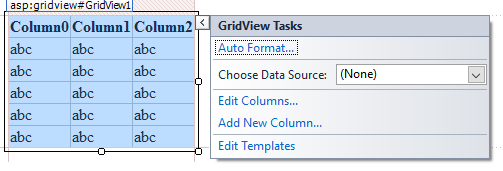
- In the designer, click the disclosure arrow (the small button to the top right of the grid view) and in the box that appears choose new datasource from the drop down list
- Choose Database and provide an appropriate name, such as PhoneBookDataSource and click OK
- Connect to the relevent database, and when prompted choose to save the connection string
- On the next screen, select the table that you want to show data from in the drop down list, by default it will include all the table's fields (denoted by the *)
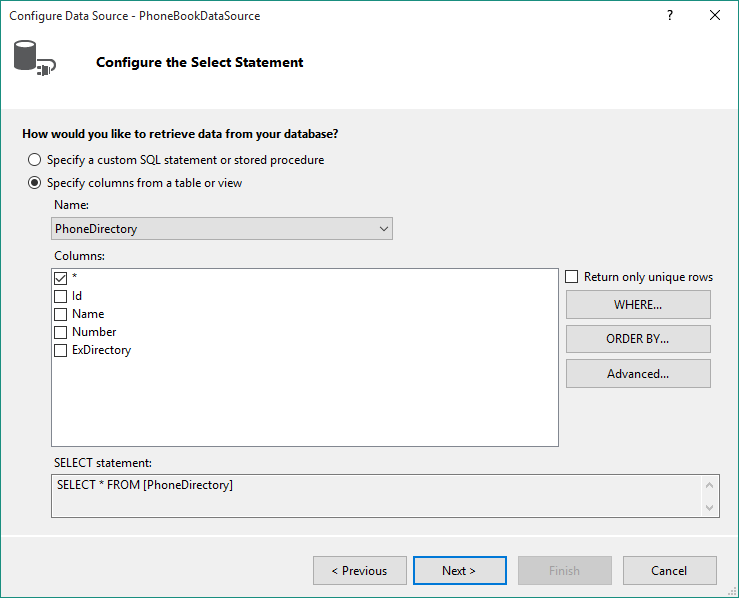
- Click next and test the query - ensure you can see all the data from the table you created earlier and click finish
- Load the page in the browser and you should see the data from the database table shown on the page.
Customising the gridview
There are several steps we can take to improve the appearance of a gridview, though we should take steps to ensure we create clean code.
One of the first issues is that the title of the Ex Directory field is taken from the database field name and therefore does not have a space - we can improve this
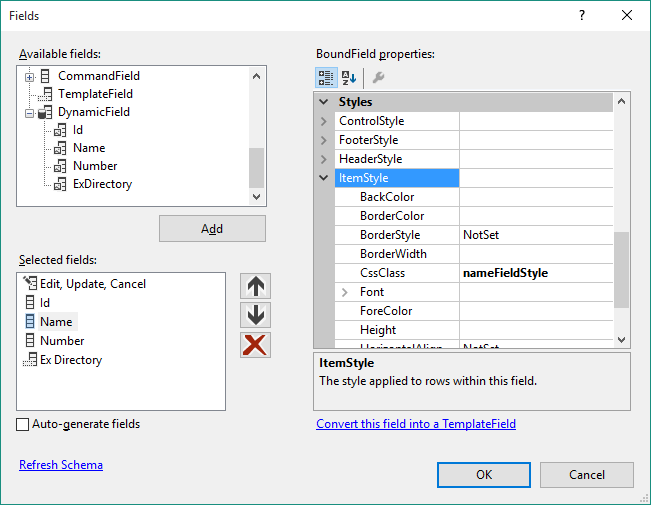
- Click on the disclosure arrow and select edit columns
- In the selected fields, choose ExDirectory and in the properties for it change the HeaderText to read "Ex. Directory"
- Also, the Id field is visible, but is of no consequence to the user. Change its properties so that it is not visible
- Run the project again and the data should be visible, but without the Id field, and with a better title for the Ex. Directory column.
It is also possible to style the gridview, however we should be aware that some of the properties of the gridview and its components would add inline styles to our web page, which must be avoided. Instead we can use the GridView's CssClass property to apply a CSS class to the entire gridview, and, to target cells, when editing the columns we can apply specify a value for the CssClass property of the Item, as shown here: